Wednesday, September 24, 2008

Kristin's Infamous Goat Cheese Stuffed Turkey Burgers

Infamous, you ask? Well, Meredith loves em! I figure if my recipe travels more than 100 miles that it must be infamous...

Sadly no pictures, but its the recipes here that matters, right?

Ingredients:
Makes about 4 burgers
  • 1 package of ground turkey (about 1.5 lbs)
  • 1/2 small package of chopped, frozen spinach (thawed and drained)
  • 1 small package of goat cheese (I believe they come between 5 and 6 oz.) *Don't use the spreadable kind, it doesn't hold up to the heat of cooking
  • 1 handful of fresh herbs, washed and chopped (I use basil, sage and oregano because that's what I grew this summer)
  • 1 T Canadian Steak Seasoning (Sometimes called Montreal Steak Seasoning)
  • Whole wheat buns
  • Green leaf lettuce
I cook mine in the oven, but these would also work on the grill or even sauteed in a pan on the stovetop. If baking, preheat oven to 400F.

Mix all ingredients together (minus the cheese, buns and lettuce obvi) in a large bowl and patty up into round burgers. Smash burgers flat and scoop one spoonful of cheese into middle of burger. Fold the rest of the meat around the cheese into a ball. Place burgers on greased baking sheet and smash down a bit into a flattened burger shape (watch out to not let cheese seep out).

Bake in preheated oven for about 30 minutes or until cooked through. If cooking on the stove top, I would just saute them in a small amount of olive oil at medium heat.

Top with your favorite condiments (I recommend a small amount of Lite Mayo) and the lettuce.

Enjoy!

Monday, September 22, 2008

Creamy Cauliflower Soup with Parmesan

I have made this easy cauliflower soup plenty of times, and have been "perfecting" it as I go. I saw this post on Becks and Posh this morning that made me decide to try a creamier version using butter instead of oil.
  • 1 head of cauliflower, separated into flowerets and rinsed
  • 1 clove of garlic, chopped
  • 1 small yellow onion, thinly sliced
  • 1/4 t (more of less depending on how you like spice) red pepper flakes
  • 1 to 2 T Smart Balance Light butter spread
  • 1 to 1 1/2 cups water
  • 1 T lite mayo
  • 1/4 cup or less grated Parmesan cheese
  • sea salt to taste
Start by browning the onions in heated butter in medium sauce pan. After onions are browned, add cauliflower, water (only fill water until t covers about half of cauliflowers), salt, red pepper flakes and garlic. Cook covered until cauliflowers are very soft, for me it was about 15 minutes.

Add mixture to blender or food processor and blend until smooth and few lumps remain. Stir in mayo and Parmesan cheese.

Serves 2 large bowls.

Thursday, July 31, 2008

Chocolate Peanut Butter Ribbon Dessert


Chocolate Peanut Butter Ribbon Dessert

I made some substitutions to the original recipe by using Splenda instead of sugar, lite whip cream, all natural peanut butter and Dutch Baking Chocolate for the middle layer....it was divine.


Enjoy!!!


Tuesday, July 29, 2008

Eating Healthy

I've been thinking about this for a few weeks, but haven't had much time to "blog" about much of anything, but Jamie's post at Oh! How Lovely! inspired me to mention this today.

Since I have started my involvement with food blogging, I have wanted to try new things, learn how to bake, and cook often in order to have new content for this thing (if only for myself, since I don't have too many loyal followers as of yet;) ) but in doing so, have just started cooking way too much outside of the way I prefer to eat.

I was talking about this yesterday to my brother, when I had him over for supper. I made Chicken Fajita Burgers (YUM!) which actually aren't horrible for you, but of course I had some dessert left over from when I made the Chocolate Peanut Butter Ribbon Cake a few days ago...don't worry pics to come. ANYWAYS, we were talking about how I am lucky because I generally just like, and prefer, to eat healthier foods. Of course I have my weaknesses and there are days when I can sit on my couch in front of the TV and meal out on chips and 7 Layer Mexi Dip, or when M orders the Gotham Pizza from Domino's and I (of course) have to have a piece (or three). But in general, I really would rather eat healthy foods.

So, in addition to the fact that I need to get my rear back into training condition (for a half marathon, I don't care what MN says, I just cannot force myself to marathon train right now) I am going to cease baking all these sweet things that taste so good...but are soooo bad for us.

With M starting to run with me now, it is the perfect time to regain my healthy cooking mentality...so be on the lookout for some recipes that you won't feel guilty about throwing together...if I can get some time with our big move coming up this week!

When I commented on Jamie's post, I mentioned that what helped me really learn what I should be eating was MyFoodDiary.com. That thing is a life saver! Since I started using it last year (although I don't anymore cause I generally got the lay of the land and decided to quit paying the measly $9 a month because I am THAT broke) I have gotten my bff to use it, her mom, my other bff MN, and I have tried (unsuccessfully) to get my mom on board as well as M's sister. Point is, it is a really great tool and I like it better than other online food trackers because they have a ton of brands in their database as well as hundreds of restaurants, so it makes it that much easier to log what you eat.

If you're having trouble with your weight, try it out. I think you would be surprised at how much you actually consume, and how that has affected that horrid number on the scale.

Sunday, July 27, 2008

Mexican Taco Salad with Soyrizo


I made this salad with leftover soyrzio/ground turkey that I used to make Soyrizo Burgers, but you could also make this with any regular chorizo sausage or taco meat. Simply mix up a salad with iceburg lettuce, diced organic tomatoes, diced organic avocado, chopped onion and the soyrizo meat.

The dressing I used was a mixture of extra virgin olive oil, lime juice, salt, chopped fresh cilantro and crushed red pepper flakes...mix it 'till it tastes good!

Toss the salad with dressing and top it off with some course salt and pepper. Enjoy!

Tuesday, July 22, 2008

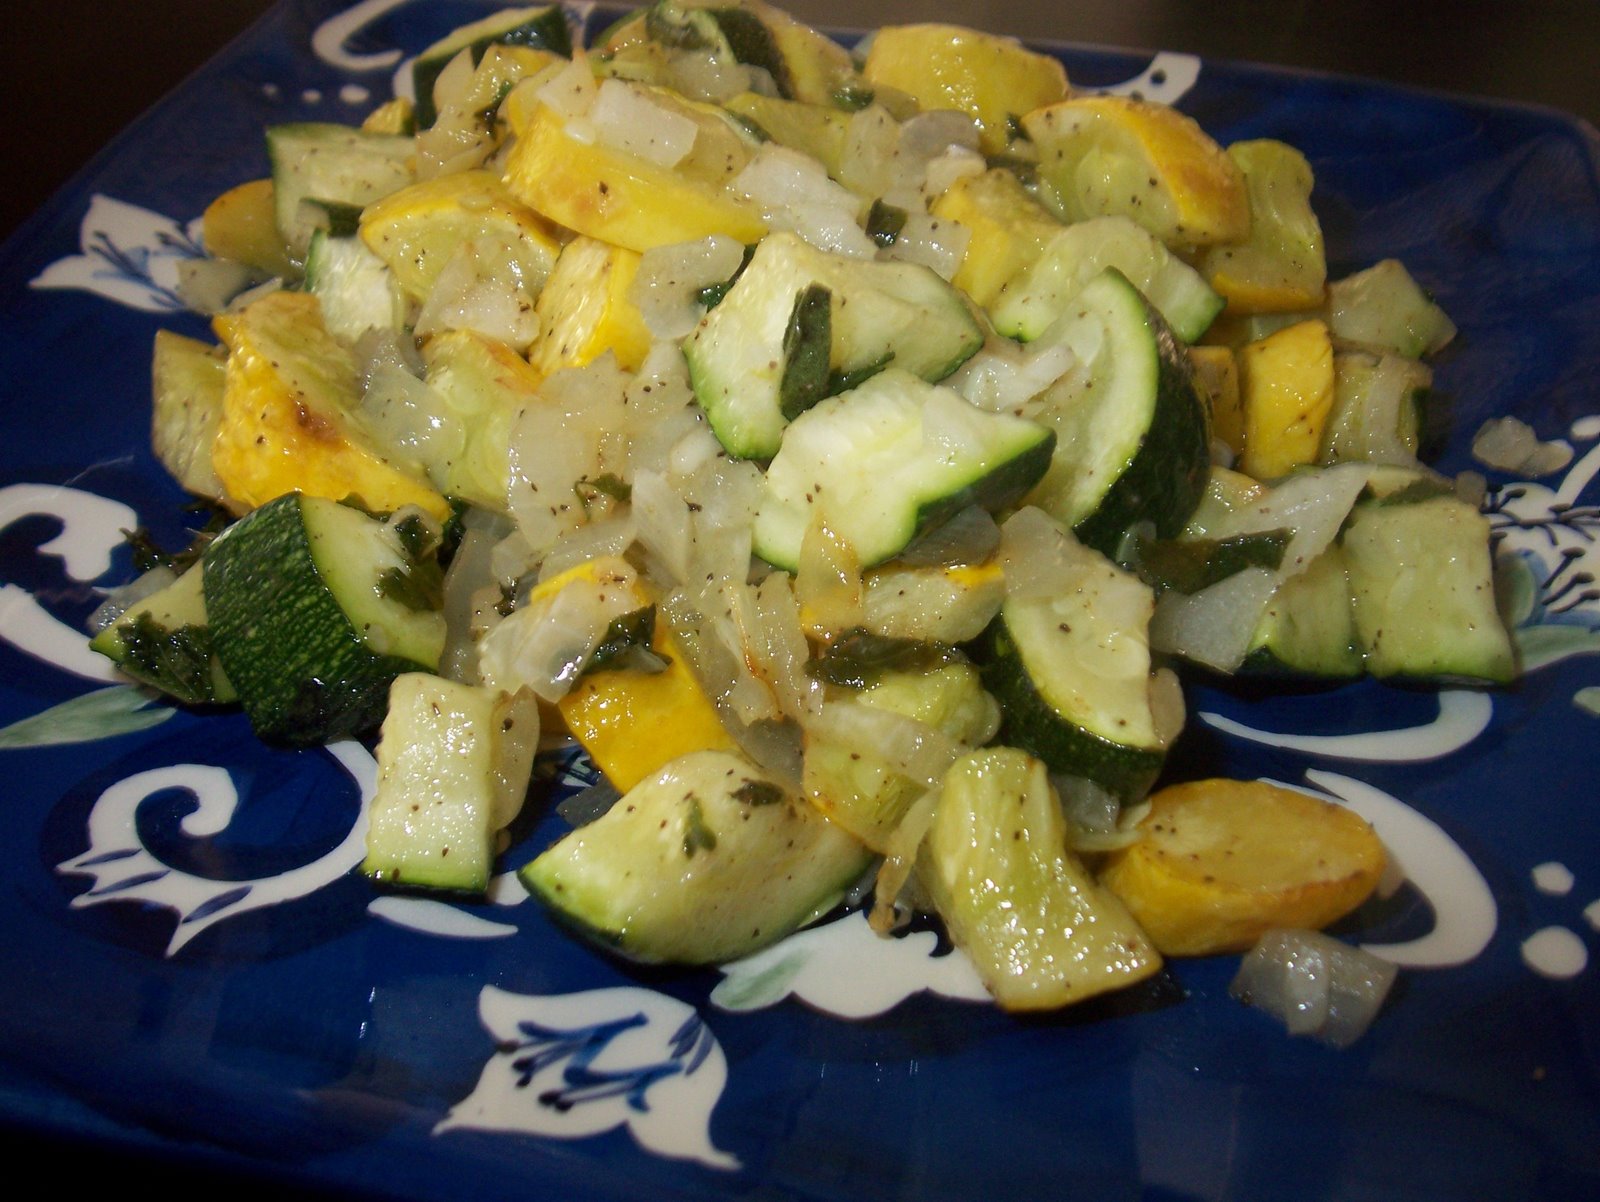
Roasted Zucchini and Squash with Fresh Herbs


Adapted from Kayln's Kitchen

Ingredients:
  • 3 to 4 medium sized zucchini and/or squash
  • 1/2 cup fresh herbs, washed and chopped (I used basil, sage and oregano)
  • 1/2 medium white onion, chopped
  • 2 T olive oil (more or less)
  • salt and pepper
  • 1/2 t crushed red pepper flakes (optional)
Preheat oven to 375 and spray a baking sheet with nonstick olive oil based cooking spray.

In a medium sized bowl, combine all ingredients and toss to coat. Spread along baking sheet in single layer and bake for 15 to 20 minutes or until soft.

The KBo Conclusion:
While M didn't like his portion of this veggie-licious treat, I ate mine and his! It was just the right amount of spices and oil and the baking made the veggies tender and delicious.

M said he didn't like it because I "spoiled" him with a similar dish which I doused in melted mozzarella cheese. Oh well, maybe next time I'll sprinkle some on there so he will eat it...or I could leave it out so I could have extra. :)

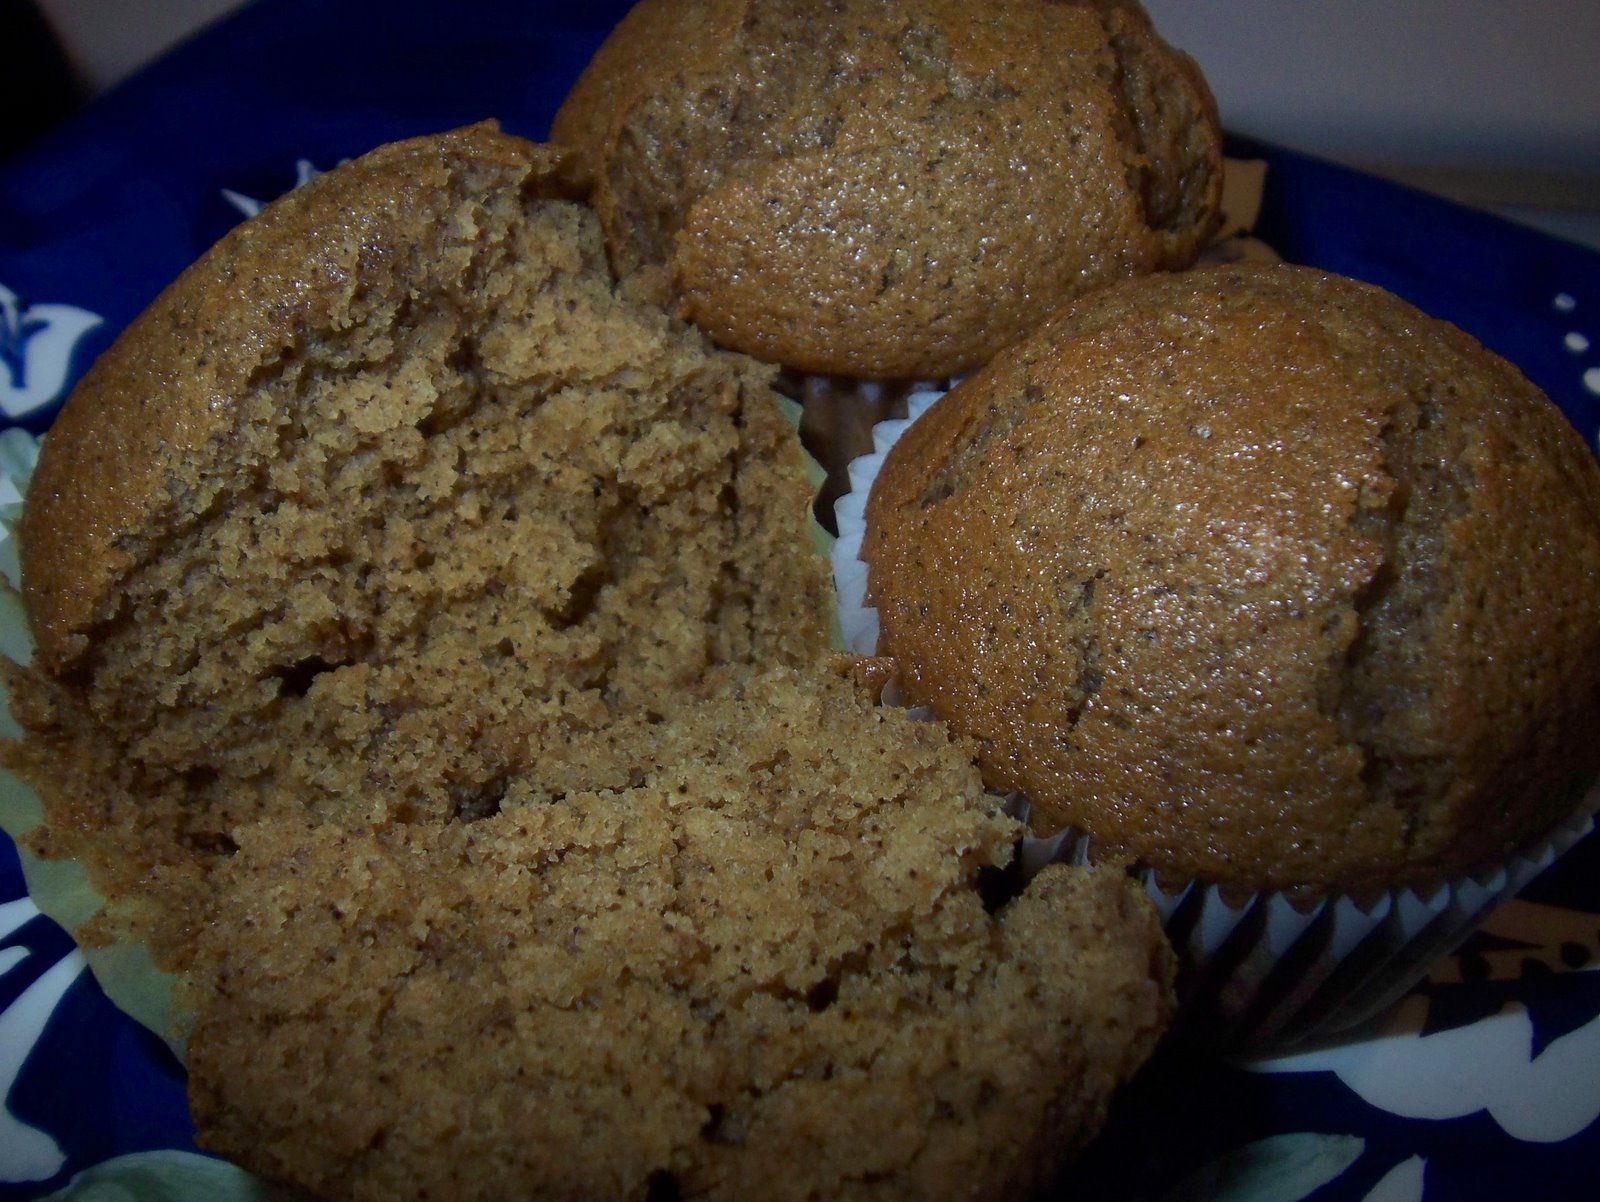
Coffee Break Muffins


Mmmmm.....Can you see the espresso flakes? These muffins are just the right amount of sweet balanced with that coffee flavor. There is a whole cup of coffee in these babies, as well as some ground espresso and brown sugar!

I'm not posting the recipe, but if you want it, pick up a copy of Baking, by Dorie Greenspan!


Monday, July 21, 2008

Heading (Further) Down South


Well it has been a long time coming, but now that I have put in my two weeks notice at work, it is a definite!

M and I will be moving to Charleston, SC at the end of July and we couldn't be more excited. I have been adding some Charleston food blogs to my blog roll just so that I can get acclimated to the foodie culture in the lowcountry, and I must say that I am excited about the opportunities that lie ahead.

First of all, there is definitely no shortage of seafood restaurants down there, which makes me giddy! There are not so many in this area, so I'm pretty stoked about that. Plus, the Charleston Culinary Institute is down there and from what I hear has a pretty good program. I might enroll in some night classes so I can actually learn a few things!

Our apartment is great, and while smaller than what we are used to now, its a bit cheaper and our balcony overlooks the harbor and the Charleston Yacht Club! One drawback though is that the kitchen (gasp!) is a bit smaller than the one here and doesn't have a dishwasher...

So yeah, going to have to get used to that. But I can make it work! Once we get down there I will post pics of everything!

In the meantime, later today I'm going to post pictures of Dorie's Coffee Break Muffins that I made yesterday morning...so good!

Hope everyone is having a great Monday! :)

Tuesday, July 15, 2008

Creamy Vegetable Risotto with Moroccan Chicken


Ingredients:
  • 12 oz. arborio rice
  • 4 cups heated stock (I used low sodium chicken)
  • 1 chopped onion
  • 1 chopped zucchini
  • 1 chopped squash
  • 3/4 cup shredded carrots
  • 3/4 cup cherry tomatoes (or other small tomatoes), halved
  • 1/8 cup dry white wine
  • 1/8 cup heavy cream
  • 1/4 cup grated parmesan cheese
  • three chicken breasts
  • Moroccan Spice mix
  • olive oil
Preheat oven to 375. Spray baking dish with nonstick cooking spray, and place chicken breasts into dish. Drizzle with olive oil to coat. Rub Moroccan spices onto both sides of the chicken generously and bake for 35 to 40 minutes until done.

If preferred, you could also cook this chicken in a heated skillet with some olive oil, although baking is a bit more healthy!

While the chicken is baking, prepare veggies and then start with risotto about 10 minutes into chicken baking time. Risotto should only take 18 to 20 minutes so keep that in mind.

Heat a tablespoon or so of olive oil on medium in a large pot, cook onions until translucent. Pour in other hard veggies, such as zucchini and squash, and cook until golden.


Stir in rice and coat with oil until translucent. Add carrots. Pour in wine and cook until evaporated. Pour in one cup of heated stock at a time, and let simmer until absorbed. Add tomatoes at this point, you don't want them to cook too long or they will get mushy!


Continue adding stock until you have used all four cups and rice has cooked about 18 to 20 minutes.When all liquid is absorbed, add in cream and cheese and stir. Take off heat and let sit covered for 2 to 3 minutes before serving.


The KBo Conclusion:
I set out to make a risotto dish last night, and followed slightly the rice cooking directions on the back of the box. You can add any vegetables you might like, I just used what I had on hand. I also think this would be great (and a bit healthier) without the cream and parmesan cheese. I tasted mine before I added these two ingredients and it was very, very good.

The chicken was great with the Moroccan seasoning and it was pretty easy to fix. I bought my spices already mixed, but I have seen a Moroccan spice mixture here that you can whip up yourself. In fact, I bought the spice mix to make Kayln's Crispy Moroccan Chickpeas the other night and they were delicious!

Friday, July 11, 2008

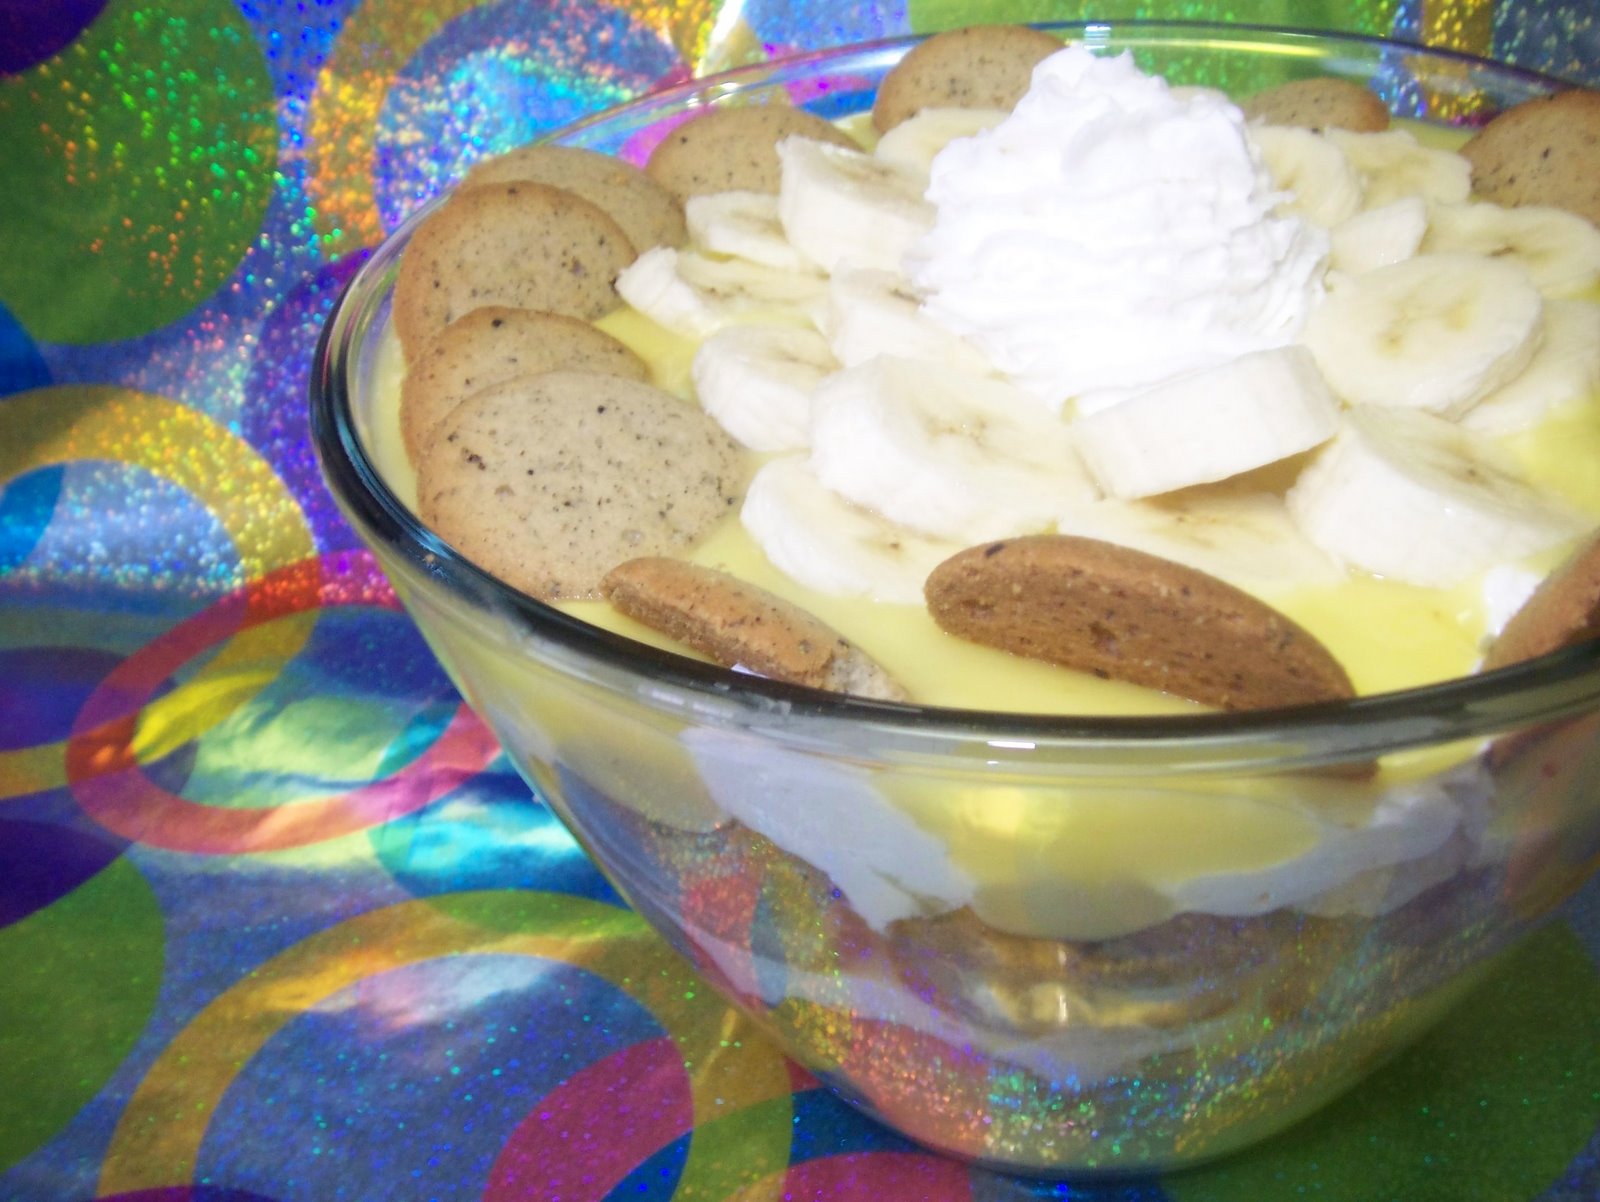
KBo's Essential (read: EASY) Banana Pudding


I'm pretty sure that every American can at least make banana pudding...the ones who can't, I'm assuming, are also the poor souls who cannot boil water.

I'm sure there are better, fancier, tastier recipes for this but I really just love what's easy and good.

Ingredients:
2 packets of instant JELLO Vanilla Pudding
6 cups milk (I used skim)
4 organic bananas, sliced (more or less)
1 package Trader Joe's Ultimate Vanilla Wafers
Cool Whip (I used the new kind, in a can!)

Prepare the pudding packets as instructed in a large bowl, (whisk pudding with milk for a few minutes until all combined and then let stand until thick).

In a large bowl, preferably glass so you can show off the layers, start by layering the 'nilla wafers at the bottom of the bowl. Then add a layer of pudding, then a layer of bananas, then a layer of Cool Whip. Repeat until you use all ingredients, or you get to the top of the bowl, whichever comes first. :)

Enjoy!

The KBo Conclusion
I was planning on making this last night because M's parents were coming into town yesterday through to the weekend. I had a whole menu planned, and even had a chicken cooking in the crock pot yesterday morning (If you know me, you know that doing things ahead of time is not usually my forte--and I'm not even going to try to lie here, M had to put the chicken in after I was already at work because I forgot to thaw it the night before...thus entrapping the gizzard packet inside the frozen chicken). But when a family emergency forced the 'rents to turn around mid-trip, we had a crap load of food to cook (and an immaculately clean apartment, thanks M) so I went ahead and made the dessert anyways.

So when I stopped at the store on my lunch break yesterday to get the pudding, I was debating whether or not to actually follow a fancy recipe, such as this one, or just make it the easy way to save time....when I saw "cook and serve" on those JELLO packs, I said NOPE...and picked up the two instant packs.

I know, I know...food blogging is supposed to be about creating, cooking, baking new things. But whatever, we're not all Martha Stewart and everyone knows that this classic is a classic for a reason--It tastes good! So there you have it.

Although, I will say I did put a spin on this by using the Trader Joe's wafers, this was an excellent choice! These are 'ultimate' for a reason, they're packed with vanilla beans and offer a crisp, sweet flavor that Nilla Wafers just can't promise! Pick some up today, you won't be sorry :)

Thursday, July 10, 2008

How to Use Applesauce in Baking...Or, How NOT to....

Since I am still learning how to bake, and alter recipes, I have a question for any readers out there...

I have yet to figure out how to perfectly substitute applesauce for butter and/or oils. I attempted to make my Whole Wheat Carrot Cake Oatmeal Raisin Cookies last night with this method and you can basically stamp a big FAIL on that. They turned out nasty, ugh.

I know that doing this can in turn make your finished product dry, but is there are way to use applesauce that keeps a somewhat similar flavor and texture to the original?

Wednesday, July 9, 2008

Don't have time to pack a fresh lunch?


Try this!

While I don't usually condone eating frozen food or canned foods on the regular, the average working woman sometimes has to resort to frozen meals or canned veggies every now and then. I even posted about my favorite frozen meals in May, with another installment to come soon. As long as you're getting something healthy out of it, not loaded down with salty sauces or creamy cheeses, sometimes a "convenience meal" might be the way to go.

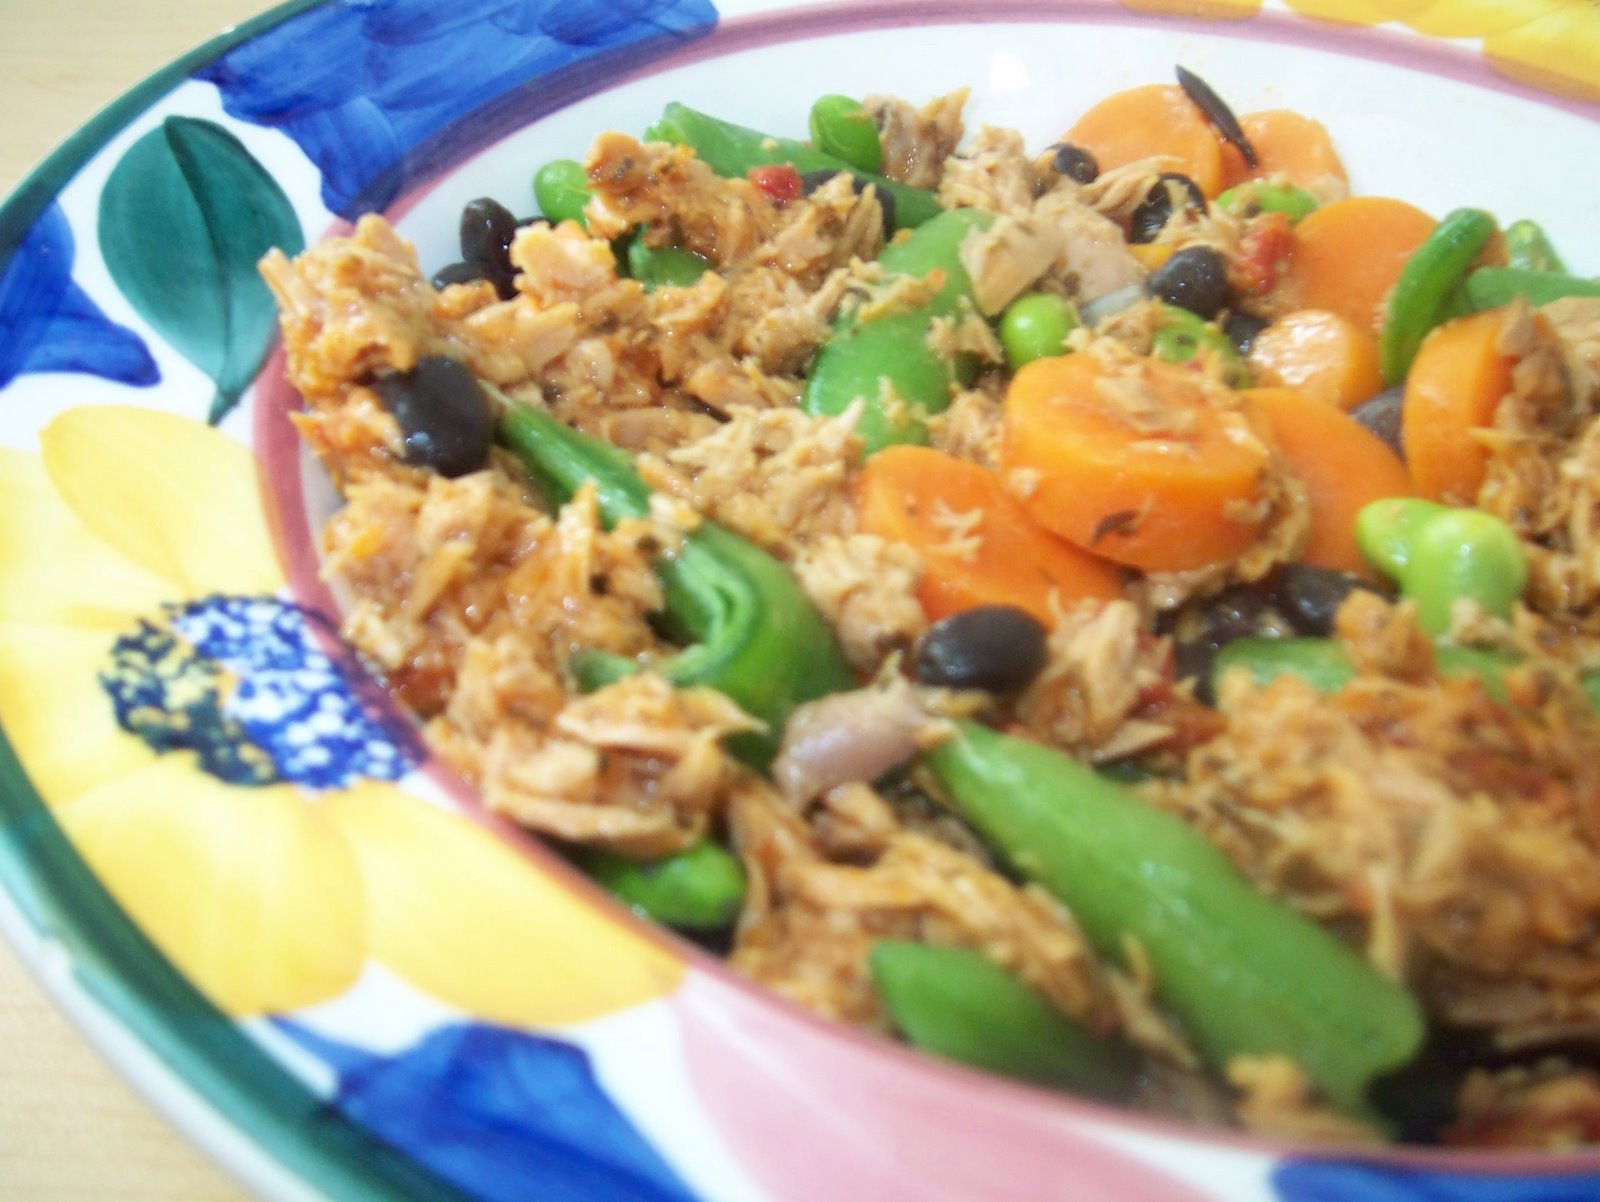
Today I grabbed whatever I had on hand at home and rushed out the door to work, and threw these two things together in a bowl for a very satisfying lunch.

BumbleBee has jumped on the wagon of flavored tuna packets, and my favorite is the sun-dried tomato and basil flavor. So that was my first ingredient, then I searched the freezer and found my new favorite go-to veggie Green Giant's Weight Management mixture, that includes snow peas, carrots, black beans and edamame in a light butter sauce.

I heated up the veggies and mixed these two together and came up with a quick, pretty healthy meal in no time at all.

Tuesday, July 8, 2008

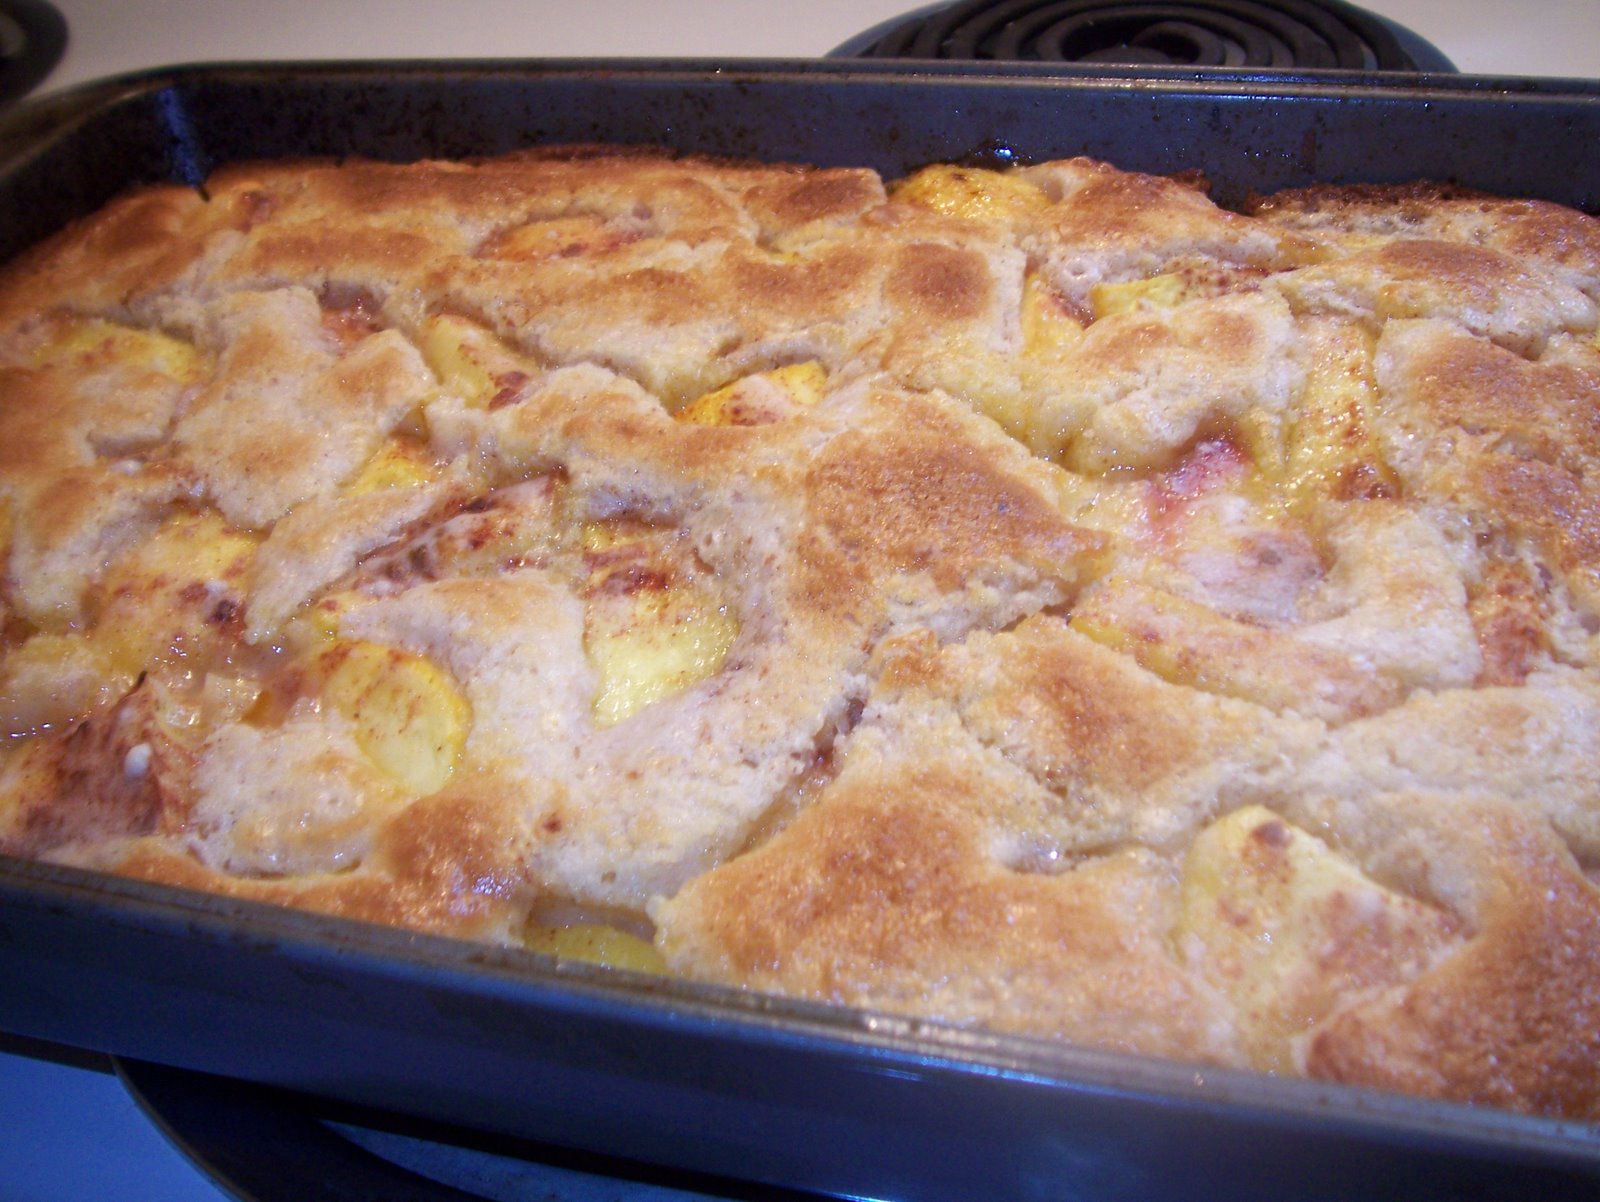
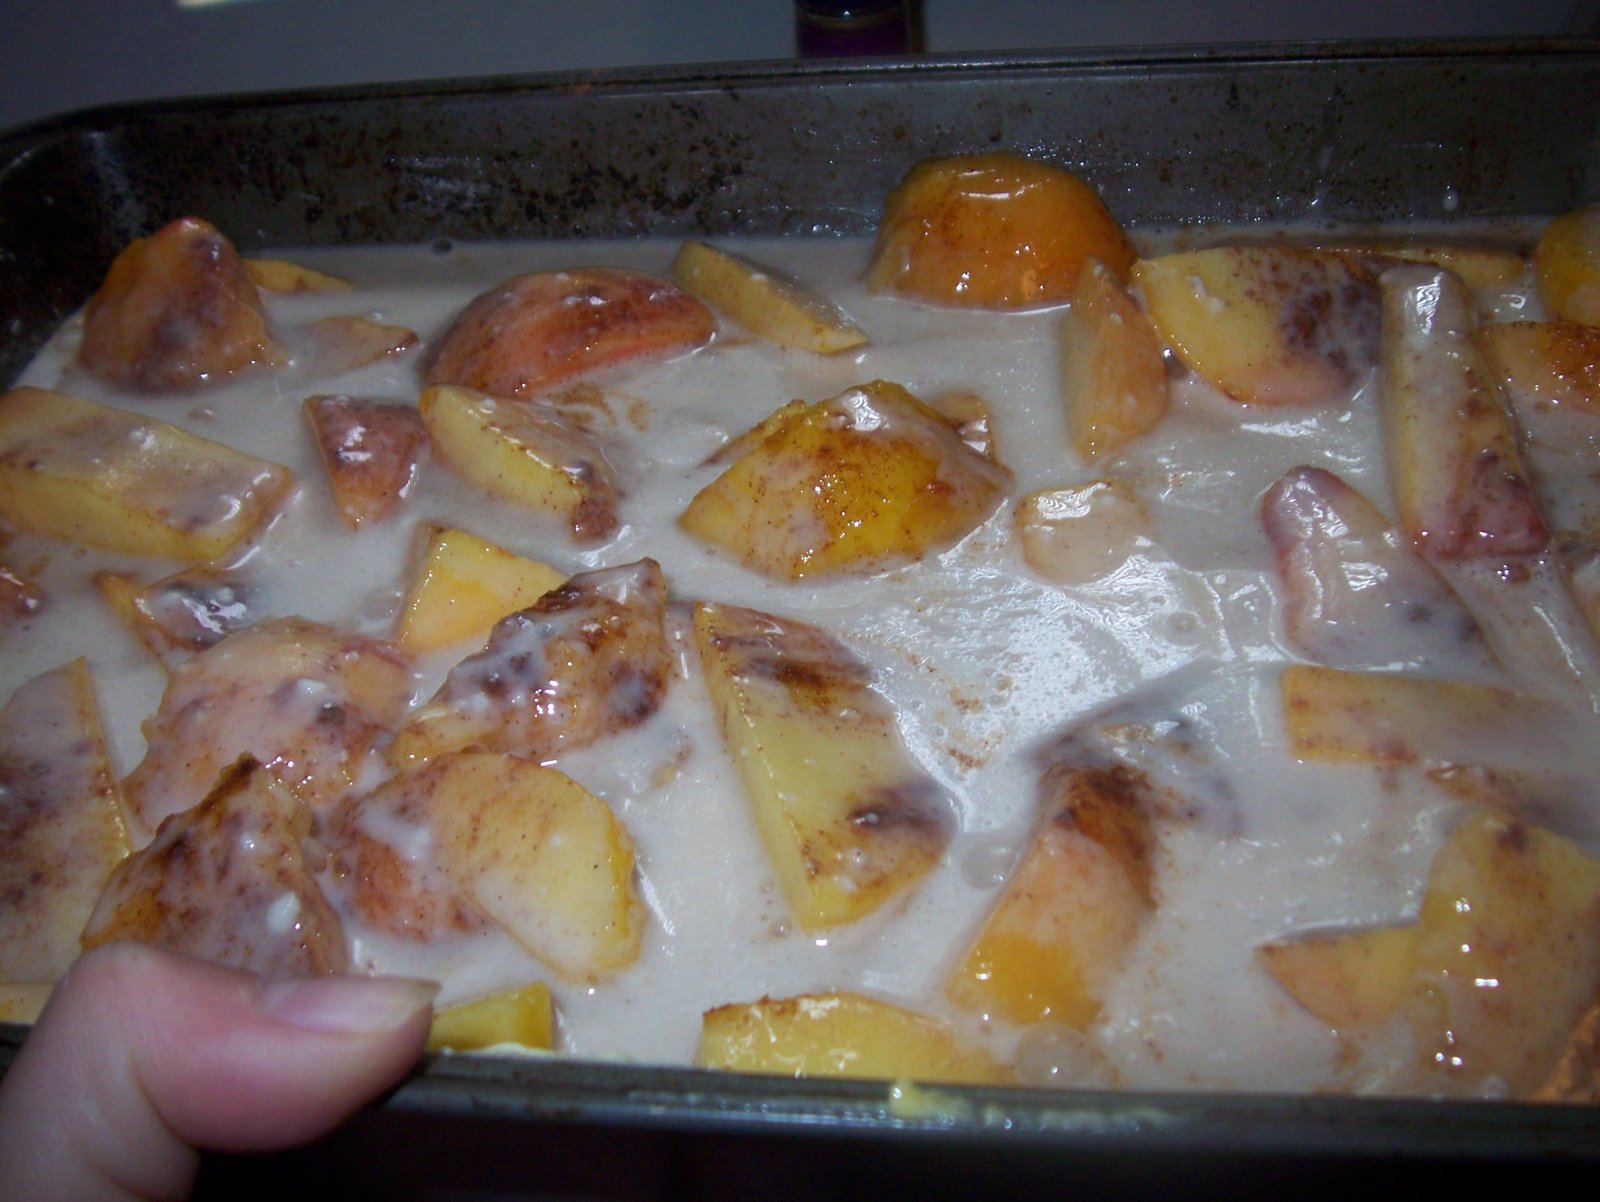
Nana's Easy Fruit Cobbler


"All the old southern ladies around here use this simple recipe for cobblers--cuppa, cuppa, cuppa. Which means one cup milk, one cup flour, and one cup sugar." -Nana

Ingredients
  • 1 cup self rising flour
  • 1 cup sugar
  • 1 cup milk (low fat is fine)
  • 1 stick butter, melted
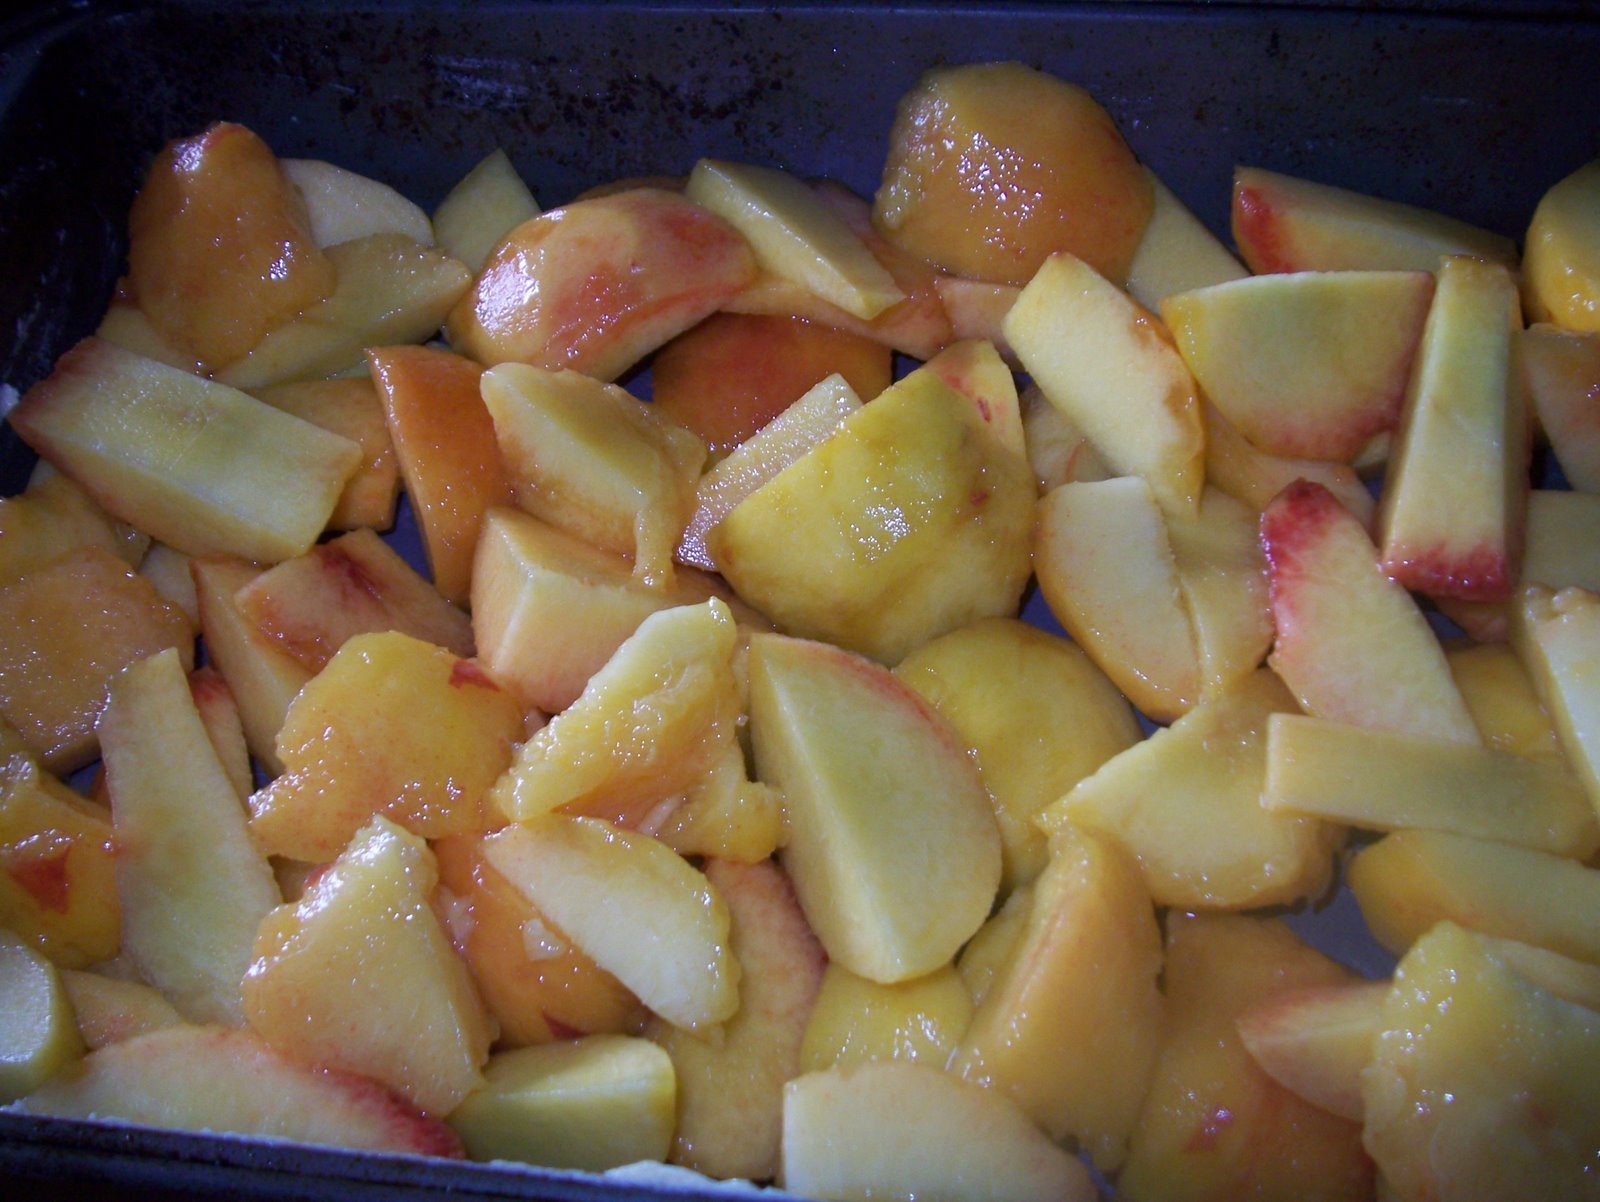
  • Fruit of choice (I used about 8 fresh peeled and sliced peaches, you need enough to make a solid layer on the bottom of whatever pan you are using)
  • 2 tsp vanilla extract
  • 2 T cinnamon (more or less for your liking)
  • 3 T sugar
Preheat your oven to 400 degrees F.

Peel and slice your fruit of choice (if using blueberries or blackberries no peeling or slicing needed :)) and arrange on the bottom of a lightly greased 9" x 13" pan.


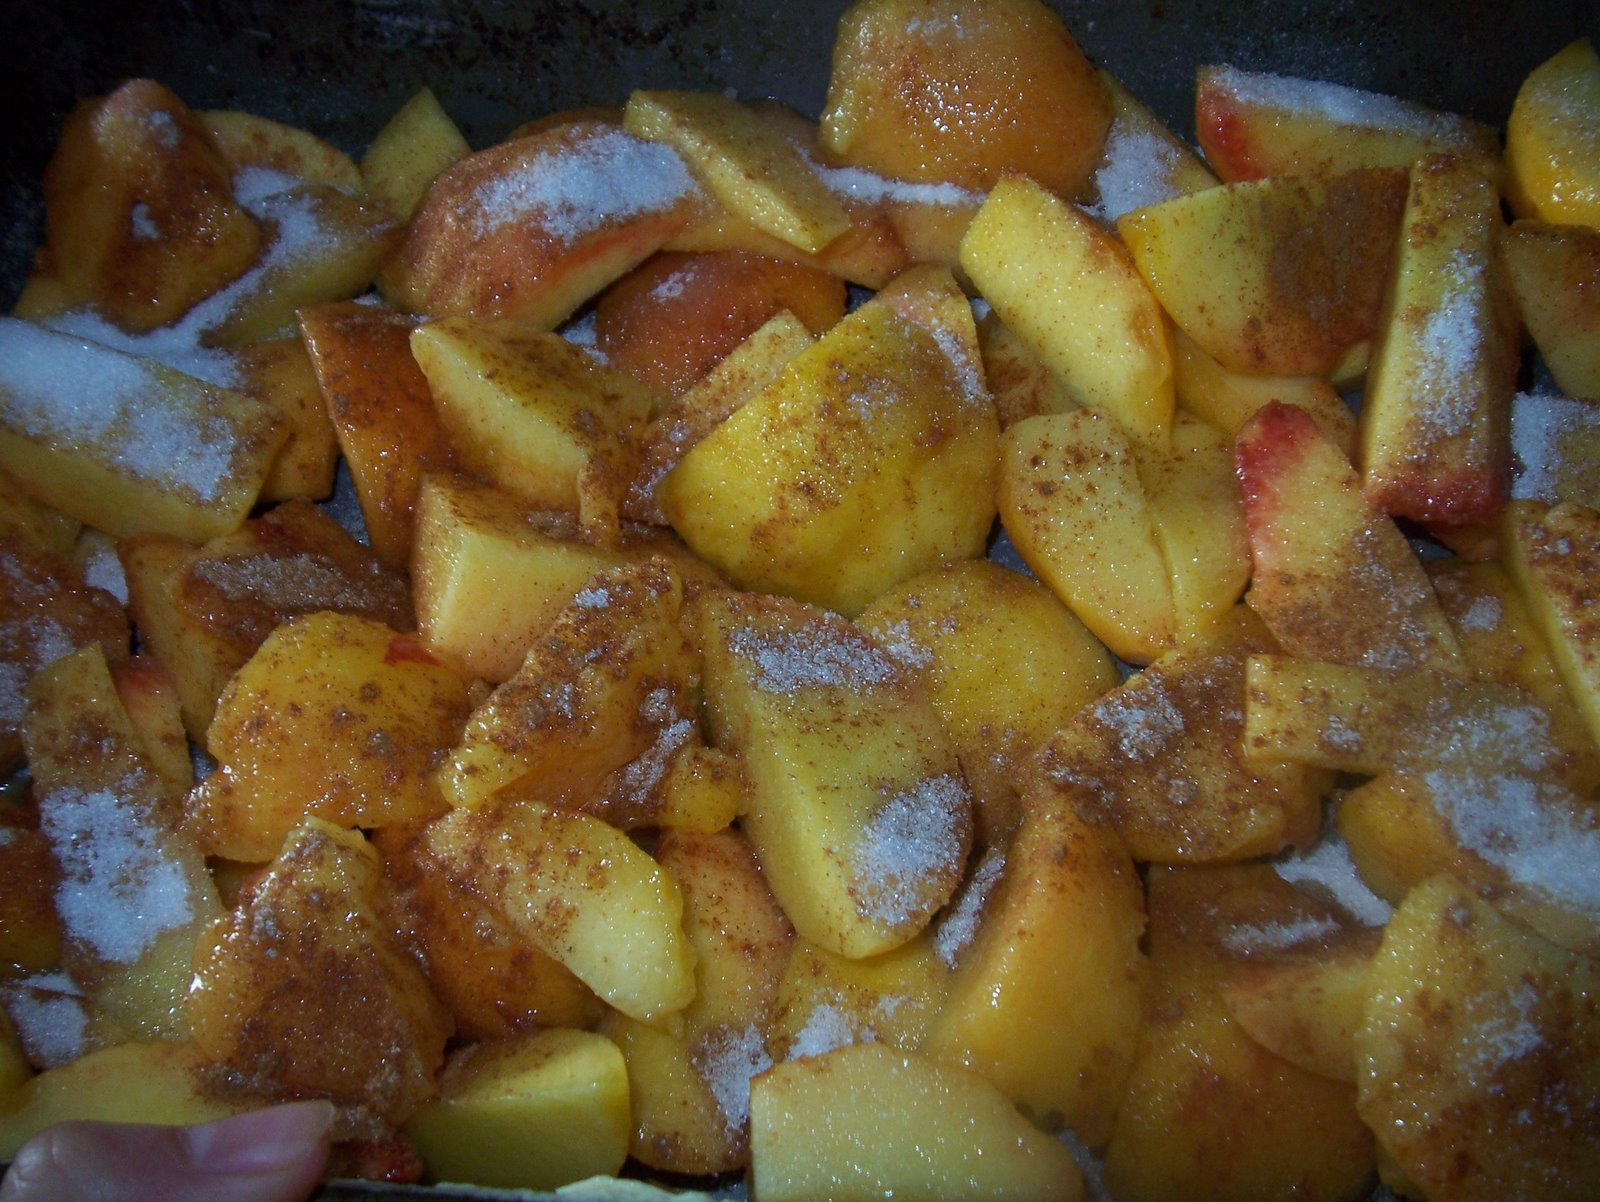
Sprinkle a few tablespoons of sugar and cinnamon over the fruit mixture, as much or as little as you would like.


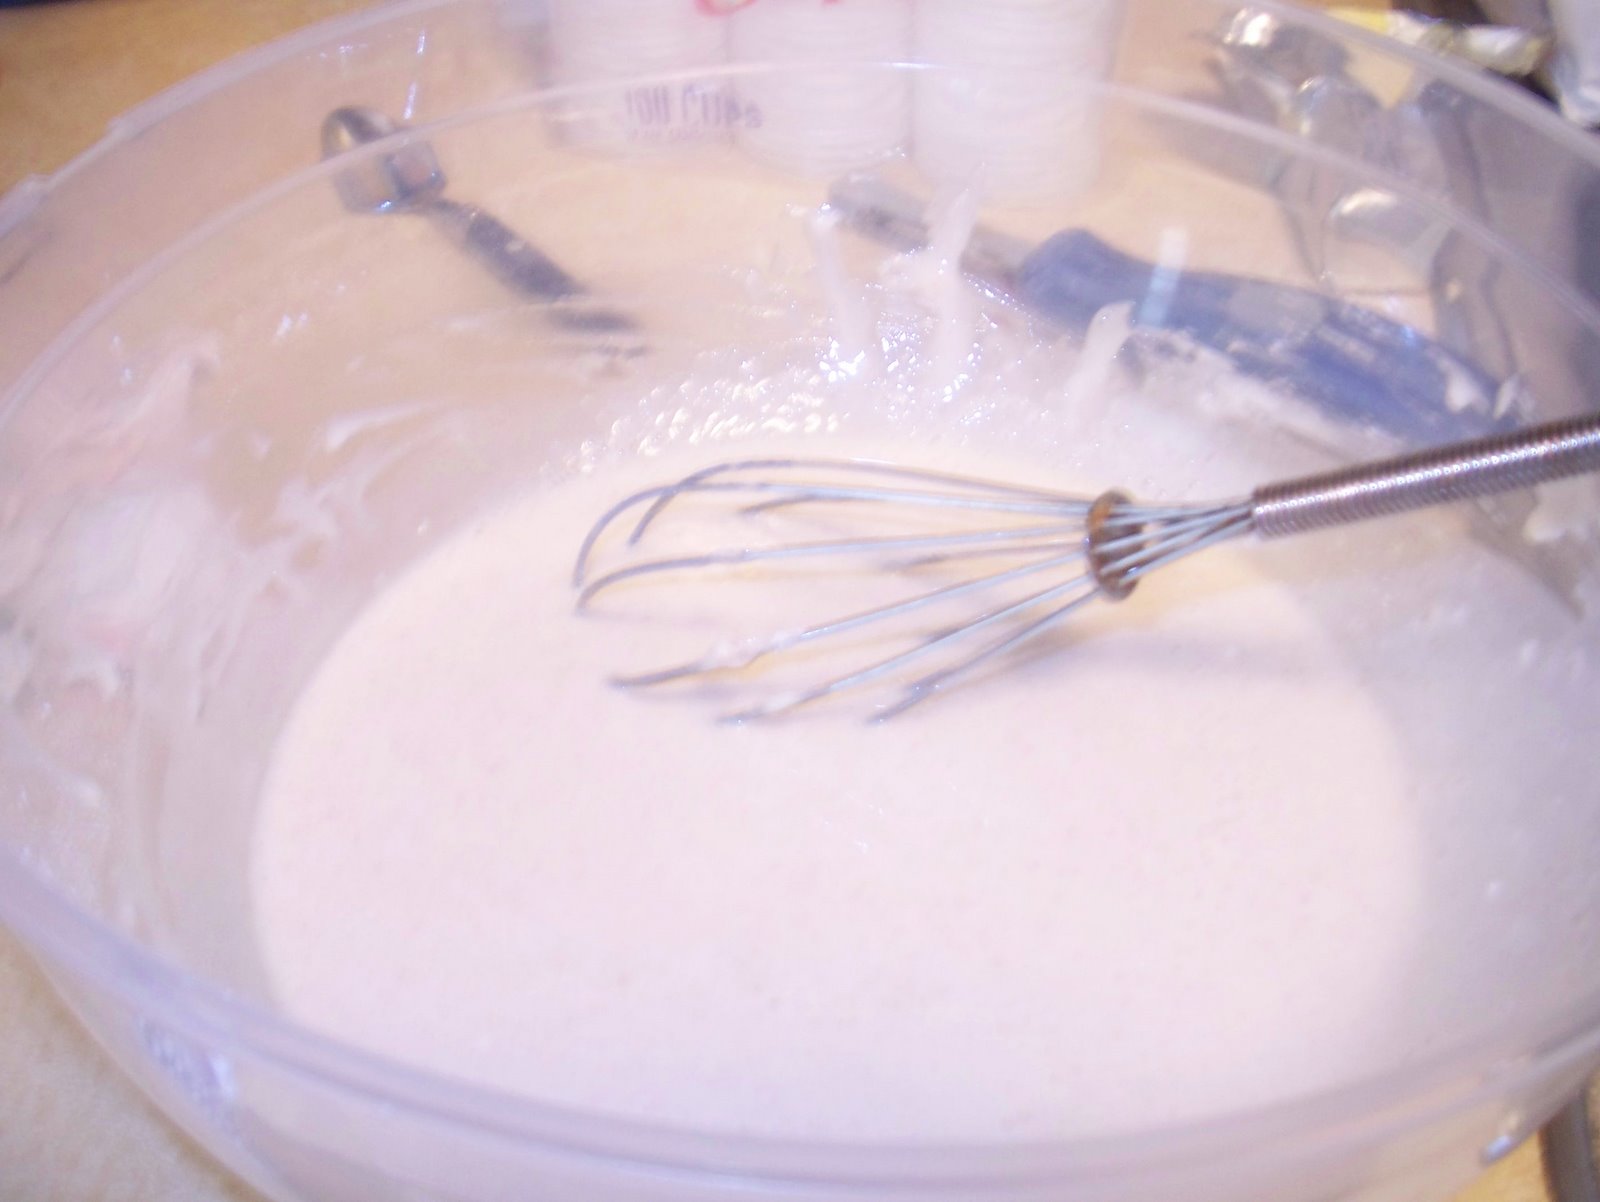
Mix togethe
r flour, sugar and milk until no lumps appear. Stir in vanilla extract. Mixture should be runny. I also added a few teaspoons of cinnamon to the batter, and I actually used about 1 1/2 cups each because I was making a bit more which turned out perfect. I also added a few more spoonfuls of flour just so that the mixture wasn't too watery, but that is all up to you.


At this point, I was a little unsure as to when I should pour the melted butter over the top of the dish, and so I just poured it in over top of everything before baking. I thought afterwards though that it might have been good to let the dessert bake and then take it out, pour the butter on and sprinkle with some more sugar and cinnamon. Either way, it will come out yummy.


Bake at 400 degrees for about 15-20 minutes, or until pastry is lightly browned.

The KBo Conclusion:

I thought that this dessert was perfect for summer, especially for our July 4th BBQ! I would like to try it again, however, and turn it into something a little healthier...I might try it with some honey or agave nectar and Splenda, also with less butter and perhaps use Smart Balance instead. I will let you know how that turns out!

But all in all, this was melt in your mouth good, and oh so easy. The part that took the most time was peeling and slicing all those peaches! Some of mine were at their peak ripeness and it was pretty hard to get the skin off those babies.

I would suggest this for any summer celebration, and it would be great with apples, cherries or blueberries as well. Enjoy!

Sunday, July 6, 2008

Happy Indepence Day, Thank you Veterans


I hope everyone had a great 4th! We went to the mountains (Boone, NC) to hang with some of M's friends this weekend. We grilled out and feasted on hamburgers, hotdogs, potato salad, coleslaw, plenty of potato chips and I made peach cobbler! We also made these cute cupcakes for the crew!

I hope you are all enjoying your weekend and celebrating safely.

I wanted to dedicate this post to all veterans who have served for our country and put their lives on the line so that we back home can safely celebrate holidays like Independence Day. Thank you for everything that you sacrifice for us. We would not be free if it weren't for you. :)

Thursday, July 3, 2008

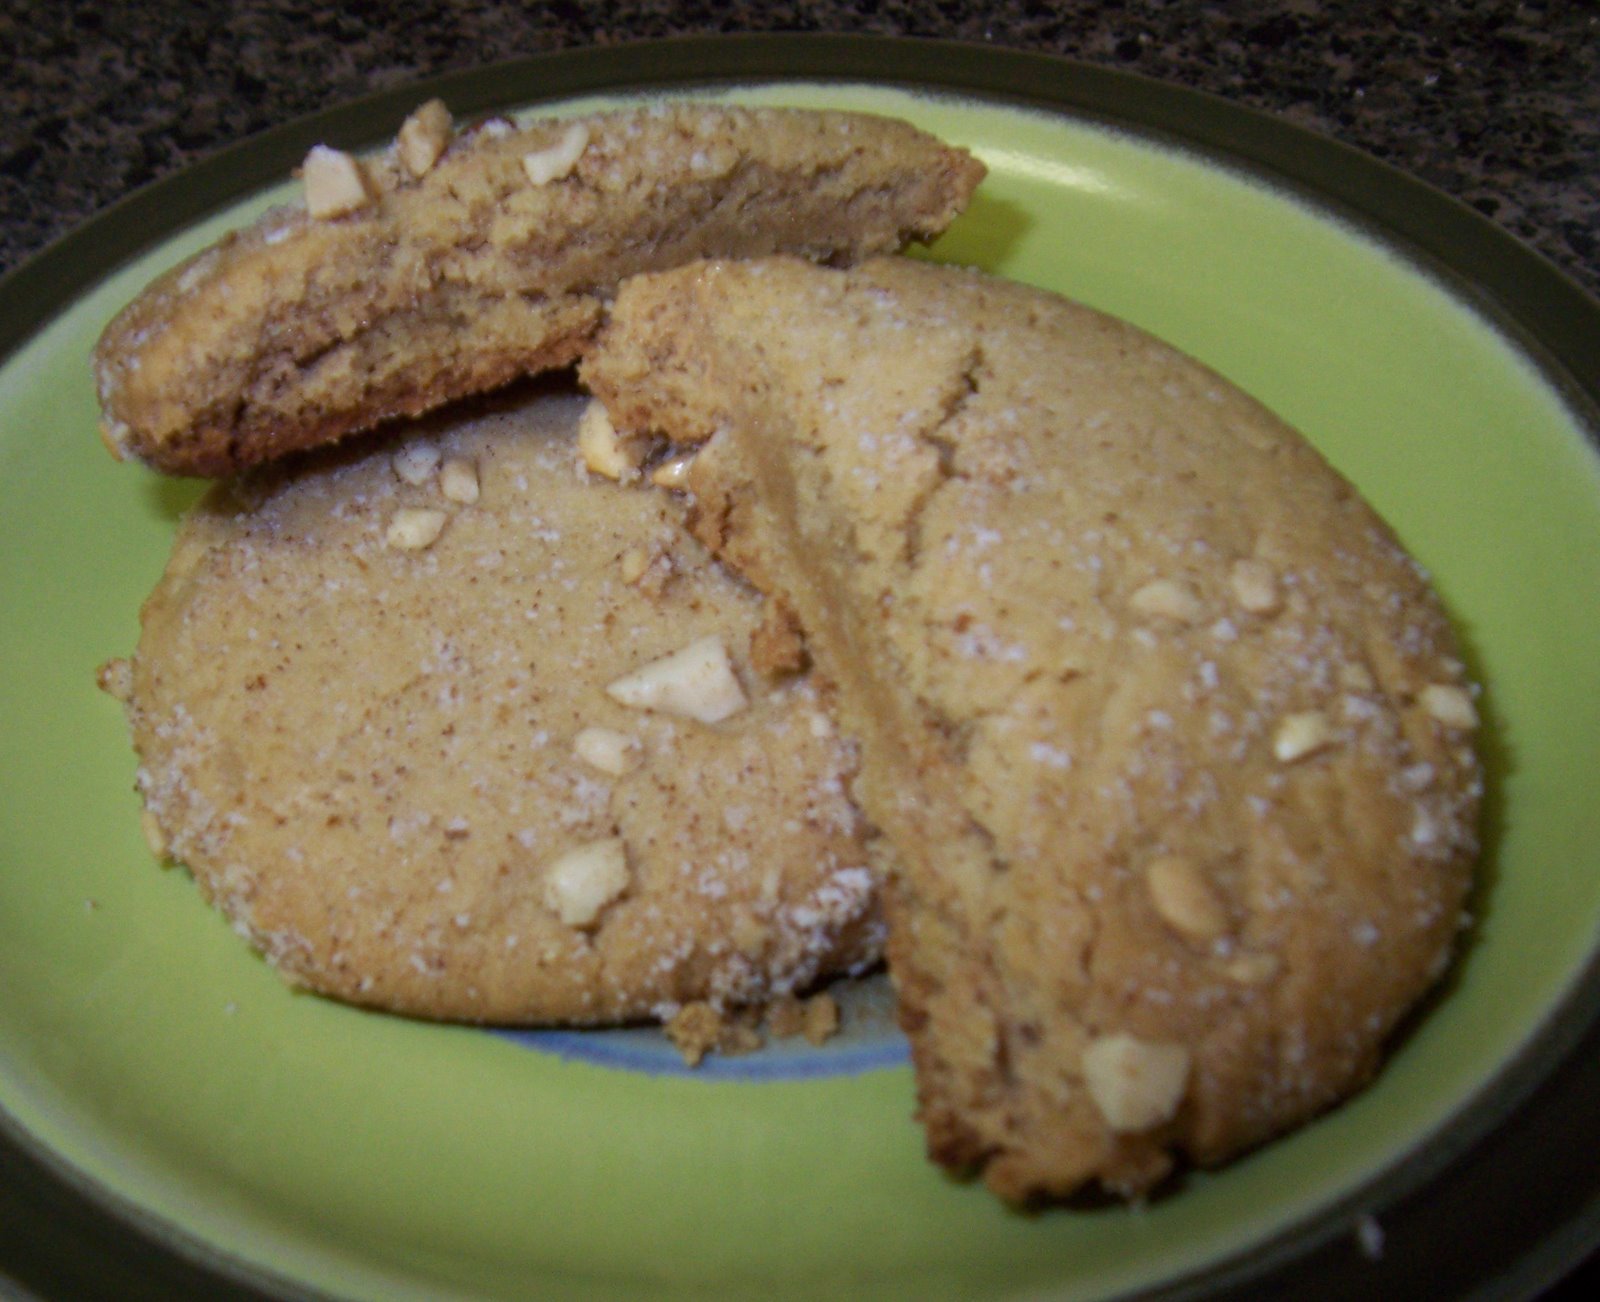
From Scratch Double-Delight Peanut Butter Cookies


From BakingBites.com

PB Cookie Dough

1 1/3 cups all purpose flour
1/2 teaspoon baking soda
1/2 teaspoon salt
1/2 cup butter, slightly softened
1/2 cup brown sugar
1/2 cup white sugar
1 large egg
1 tsp vanilla extract
1/2 cup peanut butter (smooth, national brand)

Filling and Topping
1/4 cup dry roasted peanuts, finely chopped
1/4 cup sugar
1/2 tsp ground cinnamon
1/2 cup peanut butter (creamy, national brand)
1/2 cup confectioners’/powdered sugar
generous pinch salt (recommended)

Make the cookie dough. Sift together flour, baking soda and salt in a small bowl.
In a large bowl, cream together butter and sugars until light. Beat in egg, followed by the vanilla and peanut butter.

Gradually add in dry ingredients and beat on low speed until just combined.
Spoon dough onto a sheet of wax or parchment paper, shape into a roll about 3-inches in diameter and refrigerate until firm, about 2 hours.

Preheat oven to 375°F.

Prepare topping and filling. In small bowl, mix chopped peanuts, granulated sugar and cinnamon; set aside.

In another small bowl, stir peanut butter and powdered sugar (and a bit of salt, if using) until smooth. Shape mixture 20 small (1/2 inch) balls and place each on a sheet of parchment paper. Set aside.

Remove cookie dough from fridge. Cut the log lengthwise in half, then make 10 horizontal cuts to slice the dough into a total of 20 even pieces. Each piece should be a semi-circle in shape.

Flatten each piece of dough and place a peanut butter ball into it. Shape each cookie dough piece around the filling, making sure to cover the ball completely. Repeat with remaining dough and balls.

Roll each ball in peanut-sugar mixture and place onto a parchment-lined baking sheet, leaving about 2-inches between balls. Use a flat-bottomed drinking glass to flatten the cookies down to 1/4-inch thickness.

Bake for 9 - 11 minutes or until edges are golden brown.

Cool for 1-2 minutes on the baking sheet, then remove cookies to a wire rack to cool completely.

Makes 20 large cookies

The KBo Conclusion
As a big (almost huge) fan of peanut butter anything I knew that I simply must make these cookies. Since finding this recipe, I have made them a few times and each time they simply get better. For me, it was a little bit easier to simply scoop small spoonfuls of the peanut butter mixture into the cookies, rather than making peanut butter balls and then putting that in the cookies, but you guys make them however you would like!

I especially love the warm peanut butter mixture in the middle of the cookie, it really is heavenly. Four thumbs up!

Tuesday, July 1, 2008

Soyrizo Cilantro and Avocado Burgers


Ingredients:
1 12 oz. package of Soyrizo* (Soy chorizo sausage, you can also use regular chorizo if soy isn't your thing)
1 pound lean ground beef (anything above 93% lean is good)
1 small white onion, finely diced
1/4 cup chopped fresh cilantro

1 sliced tomato
iceberg lettuce leafs
2 avocados sliced
1 package thickly sliced Muenster cheese
low fat mayo for spreading
salt and pepper
4-6 whole wheat buns

*This is the only kind I could find online, but I used a different brand that I bought at Wal-Mart.


Start by mixing the soyrizo (in my case, you had to remove the sausage from the casing and crumble into the bowl), ground beef, cilantro and onion in a large mixing bowl. After everything is mixed well, form into 4 to 6 patties. This step can be difficult if the ingredients don't hold together so be careful!


Heat a medium to large sized nonstick skillet on medium heat and then spray with non-stick cooking spray. I like to use Pam Organic Olive Oil spray. Gently place the burgers on the heated skillet and let cook on one side until a nice crust forms. Gently flip to cook the other side through. This should take about 10-15 minutes. If you are using the Muenster cheese, place one slice on each burger while still in skillet to melt.


Once the burgers are cooked, arrange on toasted whole wheat buns with the mayo spread on each side. Spread the avocado slices on the top bun half and sprinkle with salt and pepper, place the burger (with or without the cheese) on the bottom bun half, then add your tomato and lettuce. Enjoy!

The Kbo Conclusion
These burgers turned out way better than I thought they would! Although they were a little messy in the making, once everything came together the flavors of the soyrizo, cilantro, and the avocado were fabulous. I also ended up only making about three burgers for me and M to enjoy and then crumbling the rest of the meat mixture to save for leftover taco salad! (Recipe to come.)

All in all this was a flavorful and pretty healthy way to spice up the average burger, perfect for a July 4th cookout!


Friday, June 27, 2008

Whole Wheat Carrot Cake Oatmeal Raisin Cookies


Adapted from
BakingBites.co
m

Whole Wheat Carrot Cake Oatmeal Raisin Cookies
1 1/2 cups whole wheat flour
1 tsp baking soda
1/2 tsp salt
1/2 cup butter, room temperature
3/4 cup sugar
1 large egg
1 tsp vanilla extract
1/2 tsp ground cinnamon
1/2 tsp pumpkin pie spice
1 cup grated carrots
1 cup quick-cooking (1 minute) oats
1 cup raisins

Preheat oven to 350F. Line a baking sheet with parchment paper, or spray with nonstick spray.
In a small bowl, whisk together flour, baking soda and salt.

In a large bowl, cream together butter and sugar until light and fluffy. Beat in egg, vanilla and spices.


With the mixer on low speed, or working by hand, stir in flour mixture. Once no streaks of flour remain, stir in carrots, oats and raisins.


Roll tablespoonfuls of batter into balls and drop onto prepared baking sheets, flatten slightly.

Bake for 11-13 minutes, until cookies are set and lightly browned on the edges. Cool for 3 or 4 minutes on the baking sheets, then transfer to a wire rack to cool completely.

Makes about 2 dozen cookies.


The KBo Conclusion:
I loved the idea of carrot cake cookies, and knew I had to try this recipe out. BakingBites always has great recipes, so I know doubt knew these would be no exception. When my plans for last night were suddenly cancelled, I immediately knew what I could do instead (no, I'm not lame for baking on a Thursday night, what? Don't you see that Corona Lite in the pic?).

After a pit stop at the Teet (I cannot stress enough how EXPENSIVE that place is! Pumpkin Pie spice alone was $5!!) I set out to make these delicious bites.

I decided to alter the recipe a little bit by using whole wheat flour instead of All Purpose, and I think everything came out just fine! I also didn't use quite a full cup of raisins, I just didn't think it needed a whole cup after adding all the carrots. And I was right! Although, I am sure it would taste good with more raisins as well if raisins are your thing...

I was also surprised that the BakingBites recipe called to just drop the dough onto the baking sheet without first rolling it into balls. As you can see from the oven shot, thats how I made the first batch and while the tasted great, they didn't have the cookie-like shape and thickness as the finished product in the first bowl picture, above. So I added in the instructions to first roll the dough into balls and then flatten it out.

I know bakers stress parchment paper for cookies, and I guess once I get more heavily into it I will buy some, but my mom (and grandmothers for that matter) have always used good ole nonstick spray so that's what I used and guess what? They tasted great and didn't stick!

All in all these were relatively simple, very good, very cakey and the carrot adds a great amount of moisture. I give them three thumbs up!

Wednesday, June 18, 2008

Wise words from my Nana....

The quest of life...ah, that elusive carrot.

I know you've heard me say this before so here I am again. Abraham Lincoln once said "most folks are as happy as they make up their minds to be." At once a very deep but simple thought. One of those things that says easy and does hard.

Just don't forget. TODAY is your life. Don't miss it. I spent a lot of my life thinking, "When "this thing" happens, my life will get started." I missed the point that the happening IS my life. God only gives us one day at a time. Stay in the moment and get the most out of it. The future will be there when you get there.

Smile, laugh, play, treat everyone you meet with respect, give a good day's work for a good day's pay, and most important of all...LOOK FOR THE GOOD! It's everywhere.


Wednesday, June 11, 2008

Chocolate Buttermilk Cupcakes with Chocolate Buttercream Frosting

Simply, delicious. I used the cocoa I bought in the Dominican Republic and also dressed these up a bit with some coconut on top of the frosting.

Chocolate Buttercream Frosting (from BakingBites.com)

1/2 cup butter, room temperature
1/2 cup unsweetened cocoa powder
2-3 cups powdered sugar(I used 2)
1/4 cup milk
1 tsp vanilla extract

Combine all ingredients in a large bowl and beat, with an electric mixer, until frosting is creamy, 3-5 minutes. Add additional powdered sugar as needed to achieve a thick, but not stiff, frosting that is easy to spread. Add additional milk, if necessary, to thin the frosting if it gets too thick.

Chocolate Buttermilk Cupcakes (from MarthaStewart.com)
Makes 12
  • 3/4 cup all-purpose flour (spooned and leveled)
  • 3/4 cup sugar
  • 1 teaspoon baking powder
  • 1/2 teaspoon baking soda
  • 1/4 teaspoon salt
  • 6 tablespoons unsweetened cocoa powder, preferably Dutch-process
  • 3 tablespoons unsalted butter, melted
  • 6 tablespoons buttermilk
  • 1 large egg
  • 1 large egg white
  1. Preheat oven to 350 degrees. Line standard 12-cup muffin tin (or two 6-cup muffin tins) with paper liners. In a large mixing bowl, combine flour, sugar, baking powder, baking soda, and salt; set aside.
  2. With an electric mixer, combine cocoa and 3 tablespoons hot water until a thick paste forms (this process intensifies the chocolate flavor). Add butter, buttermilk, egg, and egg white; beat until combined. Whisk in flour mixture until smooth.
  3. Scoop (or spoon) batter into prepared tin(s). Bake until a toothpick inserted in the center of a cupcake comes out clean, about 20 minutes. Transfer cupcakes to a wire rack to cool completely.
  4. Use an offset spatula or butter knife to spread icing over tops. Decorate as desired.
Enjoy!

Wednesday, May 21, 2008

The Best Frozen Meals: Part I

As busy as everyone is these days, it's hard to find time to make a healthy, fresh lunch every day. That's why I like to keep a few frozen meals in the freezer at work for days when I just don't have time to pack a lunch. Instead of heading for fast food consider stocking your office freezer with these frozen - yet good for you - meals that are convenient without sacrificing your health.

Healthy Choice Cafe Steamers: Creamy Dill Salmon

With only 240 calories and 6 grams of fat, Healthy Choice got this one right. What I like most about the Cafe Steamers line is that the veggies, pasta and meat sit in a steamer basket on top of the sauce. This way, you get fresh food that hasn't been sitting in that "secret sauce" for who knows how long. You can choose to add the food to the sauce, or eat it without.The broccoli and salmon taste super fresh and will definitely fill you up until dinner. As a bonus, the creamy dill sauce is a great addition to the dish and doesn't taste at all like some of Health Choice's bland sauces.


Amy's Kitchen: Garden Vegetable Lasagna

This great tasting veggie lasagna was my first taste of any of Amy's products, and I was super impressed! I was first drawn to Amy's frozen meals because they are all organic, and lots are vegetarian. This particular one is also gluten free and uses rice noodles in place of regular lasagna noodles. I try as much as I can to eat all natural foods, and although these are usually a bit more expensive than the regular frozen meals at grocery stores it is well worth it! What I liked most was that the veggie
s were in large chunks instead of pureed into the sauce, they tasted fresh and homegrown. The cheese was gooey and tasted like it has just been baked! With only 290 calories and 9 grams of fat, this is a lasagna dish that would be good for any meal! For a tip, I buy my Amy's products at the Wal-Mart superstore, they're almost half the price there than at Harris Teeter.


Lean Cuisine Spa Classics: Butternut Squash Ravioli

This meal has a few more calories than the rest, but it's packed with the vitamin-dense vegetable Butternut Squash. The ravioli is tender and the sauce is great. The vegetables in this one are very crisp and add a great contrast to the soft ravioli. With 350 calories and 9 grams of fat, this Lean Cuisine is a great lunch time comfort food!

I hope these reviews helped, I will keep updating these as I find more nutritious choices!

Tuesday, April 8, 2008

Suppah Club

About a month ago, I decided to have the girls over to my place for some casual dinner. Why? Well, I love to cook and entertain for people (and I think I am getting better at it each time I try) and the boyfriend is gone on Tuesday nights for a late class, so I figured what better time to try out those Chicken Fajita Burgers I have been dying to try? The dinner was such a hit, that we decided to do it every week, rotating houses and chefs. You bring together good food, wine, girls, gossip and some ANTM, something good (or quite awful) is bound to happen. Well, after a few weeks eating mediocre food at friend's houses, (ok just kidding gals! You know that everything has been wonderful, but this is my blog so I have to talk trash) this week the feast is headed to 5235 (that's my apartment number if you're slow).

Now before I started this ingenious gal pal get together, I enjoyed my Tuesday nights alone freely roaming through the aisles of Target with no curfew (ok, I don't really have a curfew but the man likes to eat, and you know how I love to cook) or hitting the gym for a few hours with no one there bugging me about, "Are you done? When are we leaving? I'm tired." And no, I don't have a five year old child, but rather a 28 year old boyfriend who does not love to work out (although to his credit, he did run the Cooper River Bridge Run this past weekend with me, without stopping!).

So I guess what I am trying to get at, is that before we started doing this I truly relished the one evening that I have with the house to myself; and the fact that I could aimlessly shop after work with nothing to rush home to. Not that I don't love coming home to Matthew every evening, I do, but we all know that a little alone time never hurt anybody...and us females need it to de-steam ourselves sometimes (that's not really a word, but we do tend to get steamed up, so de-steaming seemed approp). But all that being said, I am definitely glad that we have started this tradition and I plan on enjoying it as long as it lasts.

So for tonight's menu, I am sampling a bit from Kalyn's Kitchen as well as Culinary Concoctions. Someday I won't have to sample from anyone, I can just pull recipes out of my head, but until then this blog is going to have to be a regurgitation of other people's recipes (other very creative, ingenious, culinary wizards, if you will). It also must be noted, that today I made my first batch of cookies from scratch, and although I only had one egg when the recipe called for two, I must say that they turned out delicious! Even though they are probably one of the most unhealthy things ever invented...but if we exercise regularly we can cheat every now and then, no?

I am going to post the recipes and links now, and then pictures later on this evening after everything is cooked and gobbled up.

Main Course:

Grilled Ginger Soy Pork Chops
Adapted from Kalyn's Kitchen

(4-6 servings, recipe created by Kalyn)
4-6 boneless pork chops

Marinade:
1/4 cup peanut oil
1/4 cup soy sauce
1/4 cup rice vinegar (not seasoned rice vinegar, it contains sugar)
1 tsp. dried chili pepper flakes (I used red chili flakes)
2 tsp. ginger puree (also called ground ginger)
2 tsp. garlic puree (also called ground garlic)
1 tsp. dried mustard

Trim all fat from pork chops and pound to slightly over 1/4 inch thick. (If you're using the very thick pork chops you might want to cut them in half crosswise.) Mix marinade ingredients. Put pork chops in zip-loc bag and pour marinade over. Marinate 6-8 hours or longer.

To cook, preheat grill to medium hot. To get those nice grill marks, rotate the pork chops after about 4 minutes on the first side. (I usually lift one up and check for the marks before I rotate them.) Cook about 8 minutes per side; total cooking time will depend on the temperature of your grill and the thickness of the pork chops. Pork chops should feel firm to the touch but not hard when they're done. Serve hot.


Asian Cabbage Salad with Sesame Seeds
(Makes about 4 servings, recipe adapted from the original South Beach Diet Book.)

6 cups green cabbage, sliced in strips (about 1/2 large head of cabbage)
2 T sesame seeds, toasted
2 T peanuts (or more)

Dressing:
2 T rice vinegar (don't use seasoned vinegar, which contains sugar)
1 T sesame oil
1 T agave nectar (can use honey but agave nectar is lower on the glycemic index)
1/8 tsp. Thai Chili Garlic Paste (or use a few drops of your favorite hot sauce)
1/8 tsp. grated ginger (I used ginger puree from a jar)

Slice cabbage in strips about 3/8 inch wide, cutting strips in half crosswise is they are too long. Mix rice vinegar, sesame oil, agave nectar, Thai Chili Garlic Paste and ginger in a small jar and shake to combine. (Can also wisk together in a bowl.) Toast sesame seeds about 1 minute in a small dry pan, until they start to be fragrant and slightly browned. Put cabbage strips into mixing bowl, toss well with dressing, arrange on individual serving plates and sprinkle with sesame seeds and peanuts.

Dessert:

Chocolate Covered Sunflower Seed Cookies

1 cup unsalted butter, at room temperature
1 cup packed dark brown sugar
½ cup granulated sugar
2 eggs, at room temperature
1 tsp vanilla extract
2 ¼ cups flour
1 tsp baking soda
¼ tsp ground sea salt
1 ½ cups chocolate covered sunflower seeds, unsalted(see note)

Preheat oven to 375F.
Cream together butter and sugars, about 3 minutes.
Add eggs one at a time and scrape down bowl after each addition.
Add vanilla and beat for 30 seconds.
In a separate bowl, combine and sift together flour, baking soda and sea salt.
Add flour mixture to butter mixture and mix on low until fully incorporated.
Stir in chocolate covered sunflower seeds.
Form into 1-inch balls and place on a ungreased cookie sheet. Bake for 8-9 minutes.
Let cool for 2 minutes on pan and then move to wire rack.
Makes about 38 cookies.

NOTE: Chocolate covered sunflower seeds are found at Trader Joe's. I bought one container and while this was not 1 1/2 cups, it still was enough. If you cannot find these in the store, you can also order them online or substitute ¾ cup unsalted sunflower seeds and ¾ cup mini semi-sweet chocolate chips.


UPDATE:

I overcooked the pork, salad was kind of bland. But--the cookies were fab!

Thursday, April 3, 2008

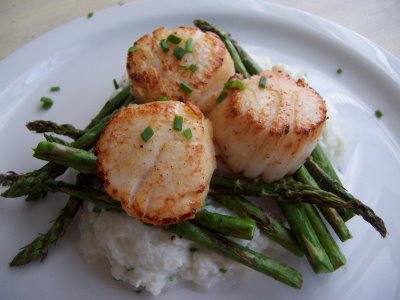
Seared Jumbo Scallops with Cauliflower Puree & Grilled Asparagus


Last month I wrote about how I made Easy Cauliflower Soup, and while browsing food blogs today I came across a recipe that included cauliflower mash made with Greek yogurt. Now, I don't really know about adding the yogurt to the mash, but I am willing to give this recipe the benefit of the doubt because it looks...well, damn good.

Seared Jumbo Scallops with Cauliflower Puree & Grilled Asparagus
(serves 2)

1 lb jumbo sea scallops (about 10)
1 small head cauliflower
2 cloves garlic
1 bunch asparagus
2-4 tbs snipped fresh chives
1/2 c Greek yogurt
1/2 tbs light Smart Balance butter
Olive oil spray (or you can brush/drizzle)
Salt and pepper to taste
Seasoning salt

Directions:
Bring a large stockpot of water to boil. Add chopped cauliflower and whole cloves garlic. Simmer until cauliflower is fork-tender. Drain and remove from heat, mash with a fork until cauliflower and garlic are completely pureed. Add chives and Greek yogurt, stir to incorporate.

Meanwhile, heat a grill pan over medium heat. Spray or drizzle asparagus with olive oil, salt and pepper. Grill until just done and still crisp.

Meanwhile, in a saute pan, heat butter until foam subsides. Season scallops on both sides with seasoning salt. Place scallops in pan and do not move until they can be moved freely (not sticking at all). Turn over and remove from heat. The heat of the pan will continue to cook until perfect.

To serve, mound approx 1 c cauliflower puree in the center of the plate. Top with asparagus spears, then scallops. Garnish with chives and serve immediately.

Lime Cilantro Marinade


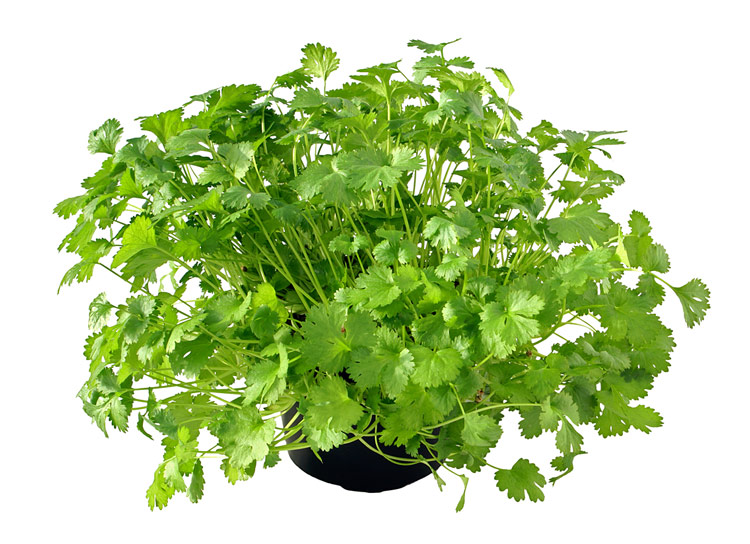
Cilantro - pronounced [sih-LAHN-troh]
This member of the carrot family is also referred to as Chinese Parsley and Coriander. It is actually the leaves (and stems) of the Coriander plant. Cilantro has a very pungent odor and is widely used in Mexican, Caribbean and Asian cooking. The Cilantro leaves look a bit like flat Italian parsley and in fact are related.


Ahh, cilantro how I love thee. Frida will agree with me--cilantro is the ooomph needed for home made salsa and guacamole, and plenty of other tasty dishes. Used best when fresh, cilantro keeps pretty well in the fridge and is relatively inexpensive to purchase (versus other fresh herbs), and the leaves and the stems are all edible.

Last night I made this quick and easy marinade for grilled chicken (but it would also be great with a white fish) and after only marinating for about 45 minutes the meat was incredibly juicy and filled with flavor when cooked.

Lime Cilantro Marinade
  • Juice from 4-5 limes
  • 1 tbls olive oil
  • 1/2 bunch of fresh cilantro, chopped
Cut the limes in half and squeeze their juice into a medium sized bowl, watching out for seeds. Chop up the cilantro and add it to the bowl along with the olive oil and mix all together.

At this point you can use the marinade as is, and just add your meat of choice, but I put mine in a food processor to get everything well mixed and to chop the cilantro even finer. This would be the best option. You could also use a blender.

Let meat marinade for at least 30 minutes, even longer for more flavor. Poke holes in meat to allow for easier absorption.

Yields marinade for 3-4 medium sized chicken breasts.

Wednesday, April 2, 2008

Glucomannan - The Magic Supplement


Women's Health recently posted the Women's Health Perfect Body Diet, and the plan included taking daily doses of Glucomannan. Glucawhat? you say?

"Glucomannan is a gentle and effective natural fiber that promotes healthy colon function. Derived from the konjac root, glucomannan is a water-soluble dietary fiber considered to be a "bulk-forming laxative." This means it may help you produce stools that are easier to pass, with less straining on your system.

Glucomannan may also promote healthier cholesterol and support healthy blood sugar levels."

This came directly from Vitacost.com where I purchased my bottle, but actually surprised me a bit 'cause WH didn't tell me this was a laxative! They told me that this root was a natural fiber that would expand in my stomach, and help me feel more full, thus...making me eat less over time.

After trying out this "magic pill" I would agree with both Vitacost and WH, the pill does provide laxative like effects (who am I kidding, it makes you poo) but it also does fill up your stomach and make you feel more full. Read more below about what WH had to say about this magic pill...

"Your Secret Weapon Sprinkle this super-fiber on your food and feel stuffed on fewer calories When you're trying to trim down, soluble fiber is your BFF--it expands in your digestive tract, making you feel fuller and warding off snack attacks. But a girl can down only so many bowls of All-Bran before she feels so gassy and bloated she's afraid to leave the bathroom. There is one kind of soluble fiber, however, that works without the nasty side effects. Glucomannan, which comes from an Asian plant known as the konjac, or elephant yam, is nature's get-skinny sponge. Able to expand up to 50 times its own water weight, it's one of the world's most effective fibers, so you can cut down on calories without even trying.

Researchers at Chicago Rush University College of Nursing reviewed 12 clinical trials to determine the benefits of glucomannan and found that it promotes weight loss and satiety.
Glucomannan is also flavorless, so you can add it in powder form to just about anything, from smoothies to frozen entrées to sauces. Mix it in thoroughly (otherwise you might get unappetizing clumps that can stick in your throat) and wait 2 to 3 minutes for it to soak up whatever sauce, broth, dressing, or other liquid is on your plate. It will thicken your food and fill up your stomach, sending satiety signals to your brain. Because of that, you'll want to wash it down with plenty of water, so drink at least 8 ounces of H2O with every meal or snack.

In addition to cutting calories, both meal plans include 6 grams of glucomannan a day. It generally comes in capsules, so break them open and mix the powder directly into your food. (Our fave: NSI Glucomannan, $10 for 180 2 g capsules,
vitacost.com)"

After using this on several occasions (I have yet to be a continuous follower of the powdery pill...so bad at taking things regularly) I must say that the 6 grams a day is definitely the most you should take, each pill (if you purchase the recommended bottle) is 2g, and when I take this it totally makes me feel full!

I usually mix it into my yogurt at breakfast, or into soups or really whatever you want. You just open up the little pill and oila! instant fullness. Be careful though, it can get clumpy and gross if not stirred enough, or if you try and put it into something small. I am going to try and use this more frequently and I will report back on my findings.

NOTE: I usually don't promote taking any pill for weight loss (thank god I listened to my bowels when everyone was screaming alli alli alli....I know I would have slipped up with some grease and had 'oily stools' or whatever it warned against) or really pills and medicine in general (yet I am the ultimate hypochondriac, go figure ) but as this is a natural supplement (from the elephant yam) I don't have a problem using it. However please note that:

Warnings
Pregnant or lactating women, diabetics, hypoglycemics, and people with known medical conditions and/or taking drugs should consult with a licensed physician and/or pharmacist prior to taking dietary supplements.

Disclaimer
These statements have not been evaluated by the FDA. These products are not intended to diagnose, treat, cure, or prevent any disease.

Monday, March 31, 2008

Banana Honey Muffins

I adapted this recipe from one on AllRecipes.com, and changed it quite a bit. I made these once before and used the original recipe and they were just not as tasty. I will post some pictures later on, but wanted to type out the recipe before I forgot. These muffins are high in fiber and really packed with nutrition. I prefer to use 4 bananas, but you can always use 3. I also make these extra large by only making 6, but you can make them smaller by making 10-12 muffins.

Here is the original recipe if you would like to compare.

INGREDIENTS

  • 1 1/2 cups whole wheat flour
  • 1 teaspoon baking soda
  • 1 teaspoon baking powder
  • 4 bananas, mashed
  • 1 teaspoon ground cinnamon
  • 1 tablespoon unsalted butter, softened or melted
  • 1 tsp milled flax seed
  • 2 tsp water
  • 2-3 tablespoons of wildflower honey (eyeball it)

DIRECTIONS

  1. Preheat oven to 375 degrees F (190 degrees C). Lightly grease 6 muffin cups, or line with muffin papers.
  2. In a large bowl, mix together 1 1/2 cups flour, cinnamon, baking soda, and baking powder. In another bowl, beat together bananas, and melted butter. In another small bowl, mix together the milled flax seed and the water. Stir the flax mixture into the banana mixture, this replaces one egg and adds nutritional value to the recipe as well as some grainy goodness. Stir the banana mixture into the flour mixture just until moistened. Stir in the honey and mix together. Spoon batter into prepared muffin cups.
  3. Bake in preheated oven for 20 to 25 minutes or until a fork pressed into the center of a muffin comes out clean.
Nutritional Information:
1 muffin
Calories, 223; Fat, 3.4 g; Saturated fat, 1.2 g; Carbs, 46.2 g; Fiber, 5.6g; Sugars, 14.8g; Protein, 4.9 g; Cholesterol, 5g, Sodium, 292; Calcium 56; Iron 0.9; Vitamin A, 114; Vitamin C, 7.4.

Saturday, March 29, 2008

My Inspiration :)


My Nana just celebrated her second 35th birthday and we threw her a big ole surprise party! Isn't my family adorable??


Shepherd's Pie

I made this a few weeks ago and it was simple and pretty good. Although next time I would use more meat/vegetables and less potatoes. Here is the recipe I used.

30 Minute Shepherd's Pie
As adapted from RachaelRay.com

Ingredients:
  • 2 pounds Russet potatoes, peeled and cubed (2 to 3 large potatoes)
  • 1/2 cups low sodium chicken broth
  • Salt and freshly ground black pepper
  • 1 tablespoon extra virgin olive oil (EVOO)
  • 1 3/4 pounds lean ground beef or turkey (I used turkey)
  • 1 carrot, peeled and chopped
  • 1 onion, chopped
  • 2 tablespoons butter
  • 2 tablespoons all-purpose flour
  • 1 cup beef stock or broth
  • 2 teaspoons Worcestershire sauce (eyeball it)
  • 1 zucchini cubed
  • 1 squash cubed
  • 1 teaspoon sweet paprika
  • 2 tablespoons fresh parsley leaves, chopped
Preparation

Boil potatoes in salted water until tender, about 12 minutes. Drain potatoes and pour them into a bowl. Combine chicken broth (add here whatever you normally do to mashed potatoes, I usually use mayonnaise and butter) and beat until smooth. Set aside.

While potatoes boil, pre-heat a large skillet over medium-high heat. Add EVOO to hot pan, about one turn of the pan, with beef or turkey. Season meat with salt and pepper. Brown and crumble meat for 3-4 minutes. Add chopped carrot and onion to the me

at. Add zucchini and squash. Cook veggies with meat for five minutes, stirring frequently.

In a second small skillet over medium heat cook butter and

flour together for two minutes. Whisk in beef broth and Worcestershire sauce. Thicken gravy, about one minute. Add gravy to meat and vegetables. (Add frozen peas here if you would like, I didn't have room for peas with the squash and zucchini).

Pre-heat broiler to high. Fill a small rectangular casserole with meat and vegetable mixture. Spoon potatoes over meat evenly. Top potatoes with paprika and

broil 6-8 inches from the heat until potatoes are evenly browned. Top casserole dish with chopped parsley and serve.


Thursday, March 20, 2008

Easy Cauliflower Soup


I saw a similar recipe for this somewhere, on some food blog but now I can't remember where I saw it...But anyways, I made this last night because I had a head of cauliflower that I needed to cook up and it was super simple, quick, and pretty tasty! I couldn't remember the original recipe so I made do with what I thought would taste good.

Isn't that what real cooks do? Make things up? I hope so cause this one worked out really well for me!

Easy Cauliflower Soup
  • One head of cauliflower, washed, separated and diced
  • 1 turn of olive oil around pot
  • 1/2 tsp of jarred garlic
  • Two low-sodium chicken bouillon cubes
  • About 3-4 cups of water (eyeball it, the water should just be covering the chopped cauliflower in the pot)
  • A dash of coriander
  • Salt and pepper
  • 1/2 of a small yellow onion, diced
Start by putting the olive oil into a hot cook pot, let it warm and then add the onion. Let the onion cook up a bit and then add the garlic and coriander. Once the onion is clear add in the cauliflower. Cover and let simmer for a few minutes, stirring occasionally to mix everything together. Add the water and the bouillon and salt and pepper, cover and let cook on medium high until the cauliflower is tender stirring occasionally to make sure the bouillon mixes together with everything.

Add 1/2 of mixture to food processor (be careful, its hot!) and pulse until blended. Add remainder of mixture and pulse until blended.

Serve!
Makes about 2-3 big bowls of soup.

Wednesday, March 19, 2008

Don't have much time to work out? Try this

Recently I have made a promise to myself that if I plan on going to the gym that day (which should be at least three times a week, more if the weather is bad and I can't run outside). I have to go on my way home from work, because if I make it home, I usually can talk myself out of going back out again--especially to the gym.

So, we all have those busy days where we have to go meet friends for dinner after work, or we have to go run errands or a movie date or anything else that could possibly keep us from working out. Well yesterday for me, that was one of those days.

My friends and I have started doing a supper club on Tuesday nights, and last night was Alesha's turn. She lives in Durham (about 20 minutes away) and dinner was at 7, so I figured I had somewhere between 15 and 25 minutes to make some magic happen at the gym.

I don't think I have ever gone to the gym for just fifteen minutes, but I figured, something was better than nothing.

So I got on the treadmill and decided that I would sprint 15 minutes, uphill. Not the most fun exercise activity but it definitely maximizes the calories that you could burn. So, next time you think you don't have time to work out, think again! Try this quick 15 minute workout and you will feel at least a little bit better about eating dinner that night.

Start off with at least a 1.0% grade, and gradually move it up to what you can handle for a constant 10-15 minutes. Somewhere between 1.0% and 4.0% (or more if you like). Start out at your normal pace (no less than 6.0, which is a 10 minute mile pace) and after a quarter of a mile, up the speed at least one point. Stay there for a minimum of 10 minutes, and see if you can make it the entire 15 (if you're really feeling good, see if you can maintain an 8.0 speed for the last quarter mile). If you can't, no worries! Keep the grade where it is and walk at about a 4.0 or 4.5 pace for the remaining 5 minutes. You should burn at least 250 calories, and hey, that's not so bad for a 15 minute quickie.

Tuesday, March 18, 2008

Cornish Hens and Chocolate Granola (But not at the same time...)

This past weekend I made what I would call my best meal ever. Sadly, there was no time for pictures of the feast before Matt and I were gobbling it up. Basically, I made two cornish game hens (we only ate one) with dirty rice and fresh Farmer's Market squash, zucchini, carrots and onions. I used my new roaster oven and it took about an hour and a half to cook.

Delish!

There was tons of leftovers, I will be eating them up in the next few days!

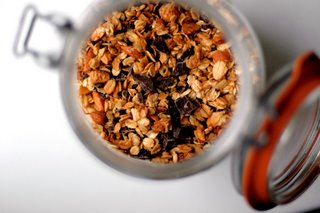
So I was browsing food blogs this morning and came across Orangette, who posted a lovely entry about Paris and her love affair with the food there. I must admit that the baguettes, cheeses, and crepes in Paris were amazing...and something I would love to experience again. She posted a recipe for French Chocolate Granola, and I must try it! Probably will make this while I have the apartment to myself later on in the week....So anyways here goes if anyone would like to try this with me!


3 cups rolled oats
½ cup raw almonds, chopped
½ cup unsweetened shredded coconut
2 Tbsp. granulated sugar
Pinch of salt
6 Tbsp. mild honey
2 Tbsp. vegetable oil
½ cup, or more, finely chopped bittersweet chocolate (Trader Joe’s bittersweet Pound Plus bar was her recommendation)

Preheat the oven to 300°F.

In a large bowl, combine the oats, almonds, coconut, sugar, and salt. Stir well to blend.

In a small saucepan, warm the honey and oil over low heat, whisking occasionally – watch out! the oil will want to splash - until the honey is loose. Pour over the dry ingredients, and stir to combine well.

Spread the mixture evenly on a rimmed baking sheet. Bake for about 20 minutes, or until golden. Set a timer to go off halfway through the baking time, so that you can give the granola a good stir; this helps it to cook evenly. When it’s ready, remove the pan from the oven, stir well – this will keep it from cooling into a hard, solid sheet – and cool completely.

When cool, transfer the granola to a large bowl, storage jar, or zipper-lock plastic bag. Add the chocolate, and stir (or shake, if using a jar or bag) to mix.

Store in an airtight container. Serve with plain milk; soy milk and plain yogurt overwhelm the chocolate flavor.

Yield: about 5 cups

Saturday, March 15, 2008

Mmmm...Apple Cinnamon Heart Healthy Flax Pancakes

It must be admitted that I love Harris Teeter. I love that they have that yummy bread section where you can get a sample of bread and olive tapenade, or bread and "European style" butter, or bread and something else equally spreadable and tasty, (I obviously need those samples, thats not extra calories at all).

But I also know that Harris Teeter (my love) is way more expensive than other grocery store chains. The cleanliness though, usually keeps me coming back for more. Especially now that they just opened a new one, literally, within walking distance of my apartment.

That being said, a new Wal-Mart SuperCenter also recently opened near my work, and while I usually loathe Wal-Mart (I am that person speeding through the parking lot willing to come dangerously close to a tortoise-like family in order to get that spot near the front) because it is usually packed to the brim with people who prefer cigarettes over showers, this one has scored a special place in my heart (right next to that special place for Target, but oh Target! how I have missed you these past few weeks as I have given up shopping).

Anyways, this new Wal-Mart is great, and they have a really fantastic grocery department, so fantastic, that I took myself there last weekend for my weekly food run. It also must be said that I have been trying to cut corners lately, since I will most likely need a new vehicle soon. ANYWAYS, I had so much stuff in my cart that I was sure it was going to be about $250 (cause it would have been at the Teet). I even said so to teh cashier, "Man this s going to be a LOT." She just smiled and said, "Maybe not." She obviously knew something I didn't.

Well....the grand total was only $150! I was so stoked--yep stoked, cause I had saved so much moolah.

I needed to explain this because while I was shopping at the WM, I noticed that they had a ton of options for natural and organic foods (which is a big deal to me, cause I try to only buy these foods) and they were affordable.

While I was browsing the baking aisle, I came across some milled flax seed, so I had to pick it up. I had been reading about how flax is so good for you with lots of Omega-3s. I always buy the Smart Balance butter with flax in it...which is a great butter substitute if you haven't tried it.

So this morning I made pancakes with the flax seed. I used Bisquick Heart Healthy mix (I usually use whole wheat mix but I was out) and where the recipe called for 2 cups mix, I used 1 1/2 cups mix and 1/2 cup flax, and also added some cinnamon to the batter. I cut and peeled an apple into really thin slices and put those into the pancakes and they were sooooo good! Probably my best ever.

The brand of flax that I used is, Hodgson Mill Milled Flax Seed. Go pick some up :) The box also says that you can use milled flax seed instead of oil in recipes! How ingenious.

Thursday, March 13, 2008

Mint Oreo Truffles

I love you Bakerella!!

I am DEFINITELY trying these babies over the weekend...

Mint Oreo Truffles

1 pkg. Double Stuf Oreos - Cool Mint Flavor - (1 lb. , 1 oz. pkg.)
• use 22 cookies with cream centers included
• use 10 cookies with cream centers discarded
1 pkg. (8 oz.) cream cheese, room temperature
chocolate bark or candy coating*
  1. Finely crush the cookies in a food processor or a ziploc bag with a rolling pin.
  2. Stir in softened cream cheese. Use the back of a large spoon to help mash the two together completely.
  3. Roll the mixture into 1" balls and place on wax paper covered cookie sheet.
  4. Place covered in freezer or refrigerator for a few minutes to help retain shape when dipping in melted chocolate.
  5. Melt chocolate as directed on the package and then dip balls into chocolate, tap off extra and set aside on wax paper covered cookie sheet to dry.
  6. Refrigerate and enjoy!
*Or, go green:

white chocolate bark/candy coating for dipping
green candy melts for dipping
  1. Make your green and/or white shamrocks first (see picture below). You can use a ziploc bag with a small corner cut off or a decorating bag with with a small round tip attached to make the shamrocks. Use a toothpick to direct chocolate into desired shamrock shape. (Of course, in hindsight, this would have been a lot easier if I had found some little shamrock sprinkles.) Let dry.
  2. Then, dip half the truffles in white chocolate and the other half in green.
  3. If necessary, dip them again for a smooth finish. I found it necessary, especially for the white ones.
  4. Then, on the second dipping, while still wet, press your cooled shamrocks gently on the top of your truffles.
  5. For another effect, you can take the ziploc bag of chocolate and drizzle across each truffle with the alternating color.
*******UPDATE********
I made these last night and they turned out well, but a little rich for our tastes. I would take the red velvet cake balls over these any day!